


فولكس فاجن لافيدا 2013-2017 تركيب العدادات الرقمية: دليل الترقية من 17 خطوات
تركيب العدادات الرقمية لسيارة فولكس فاجن لافيدا 2013-2017 بخطوات حقيقية 17
هذا تركيب العدادات الرقمية لسيارة فولكس فاجن لافيدا 2013-2017 يغطي الدليل مسار الترقية الكامل لمنصة PQ مع 17 خطوات تركيب حقيقية، ونقل اللوحة الأصلية، وفحوصات اللوحة الإضافية، وتمديد USB، والمعايرة والاختبار النهائي.
يعتمد الدليل على صور التركيب الفعلية لسيارة لافيدا من iKAGOO، ومقاطع الفيديو التقنية وإجراءات ما بعد البيع. وهو مخصص للمركبات التي لا تزال تستخدم مجموعة العدادات الميكانيكية الأصلية المطابقة.
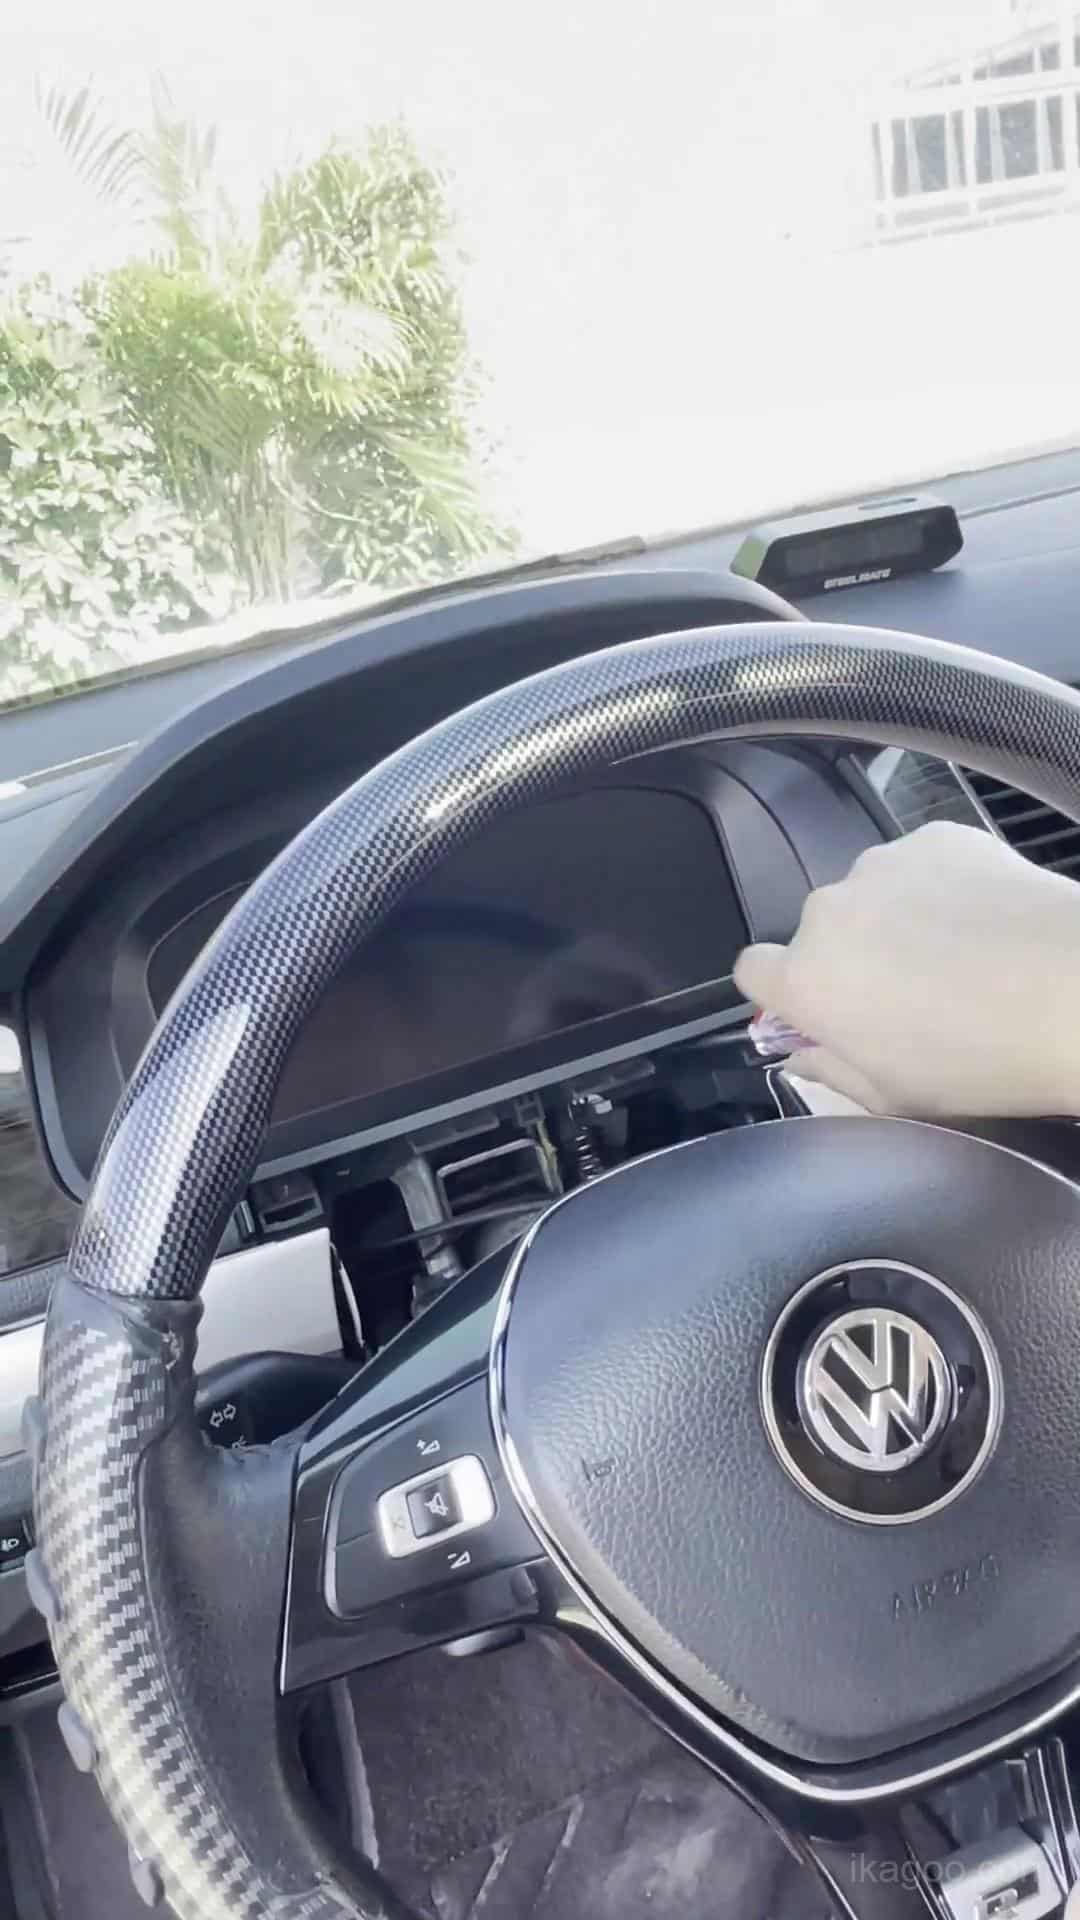
كيف يعمل تركيب العدادات الرقمية لسيارة فولكس فاجن لافيدا 2013-2017؟
الإجابة السريعة: تأكد من مجموعة العدادات الميكانيكية الأصلية أولاً، وأكمل تحضير قائمة التحذيرات الأصلية، وأزل مجموعة العدادات، وانقل الإلكترونيات الأصلية المطلوبة على طاولة عمل نظيفة، وافحص اللوحة الإضافية الاختيارية، وأعد تجميع العدادات الرقمية، ومدّ كلا كبلي USB واختبر النظام قبل إعادة تركيب إطار لوحة القيادة.
لا تكتمل المهمة عند تشغيل الشاشة لأول مرة. قد تظل هناك حاجة إلى معايرة الوقود، وإعدادات الإضاءة الفعلية، واختيار طراز المركبة، وفحوصات التحذير/العرض النهائية.
توافق العدادات الرقمية لسيارة فولكس فاجن لافيدا 2013-2017
استخدم مسار التركيب هذا عندما
- تكون المركبة من طراز فولكس فاجن لافيدا 2013-2017.
- تستخدم لوحة القيادة الأصلية مجموعة العدادات الميكانيكية المطابقة لمنصة PQ.
- يتطابق شكل مجموعة العدادات الأصلية مع مراجع التركيب أدناه.
- لم يتم تحويل المركبة إلى بنية مجموعة عدادات مختلفة.
توقف وافحص أولاً عندما
- تبدو مجموعة العدادات الأصلية مختلفة عن الصور المرجعية.
- تم تعديل مجموعة العدادات أو لوحة القيادة بالفعل.
- غيّرت الأسلاك المضافة السابقة مسار توصيل العدادات.
- لا يمكنك تحديد بنية المجموعة الأصلية.
مهم: “يعني ”التوصيل والتشغيل" أن التركيب المدعوم لا يتطلب قطع أو وصل حزمة أسلاك المركبة الأصلية. تظل إزالة لوحة القيادة ونقل المكونات الأصلية وتمديد USB والمعايرة جزءًا من التركيب.
الأدوات والتحضير قبل التثبيت
الأدوات الأساسية
- أدوات إزالة الزخارف البلاستيكية
- مفكات مناسبة
- طاولة عمل نظيفة مبطنة
- ضوء عمل جيد
التعامل مع الإلكترونيات
- فرّغ الشحن الساكن أولاً
- أمسك لوحات الدوائر من الحواف
- لا تلمس المكونات مباشرة
- لا تضغط على شاشة LCD أبدًا
قبل إغلاق لوحة القيادة
- تحقق من جميع الموصلات
- أبقِ كابلي USB متاحين للوصول
- أكمل اختبار التشغيل الأول
- أغلق الإطار فقط بعد نجاح الاختبار
لا تقم بإزالة جهاز التنبيه الأصلي للوحة العدادات. إنه جزء من مسار الأجهزة الأصلية المحتفظ بها ويجب أن يبقى مثبتًا.
مسار تركيب المجموعة الرقمية لسيارة فولكس فاجن لافيدا
أكمل إعدادات التحذير قبل الإزالة
افعل ذلك بينما لا تزال مجموعة العدادات الميكانيكية الأصلية مثبتة وتعمل.
- اضبط تحذير الإطارات الشتوية إلى القيمة القصوى المتاحة.
- اضبط تحذير حد السرعة إلى القيمة القصوى المتاحة.
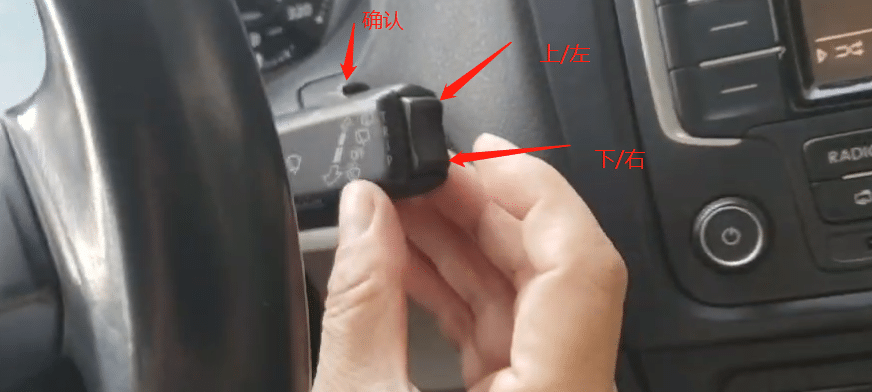
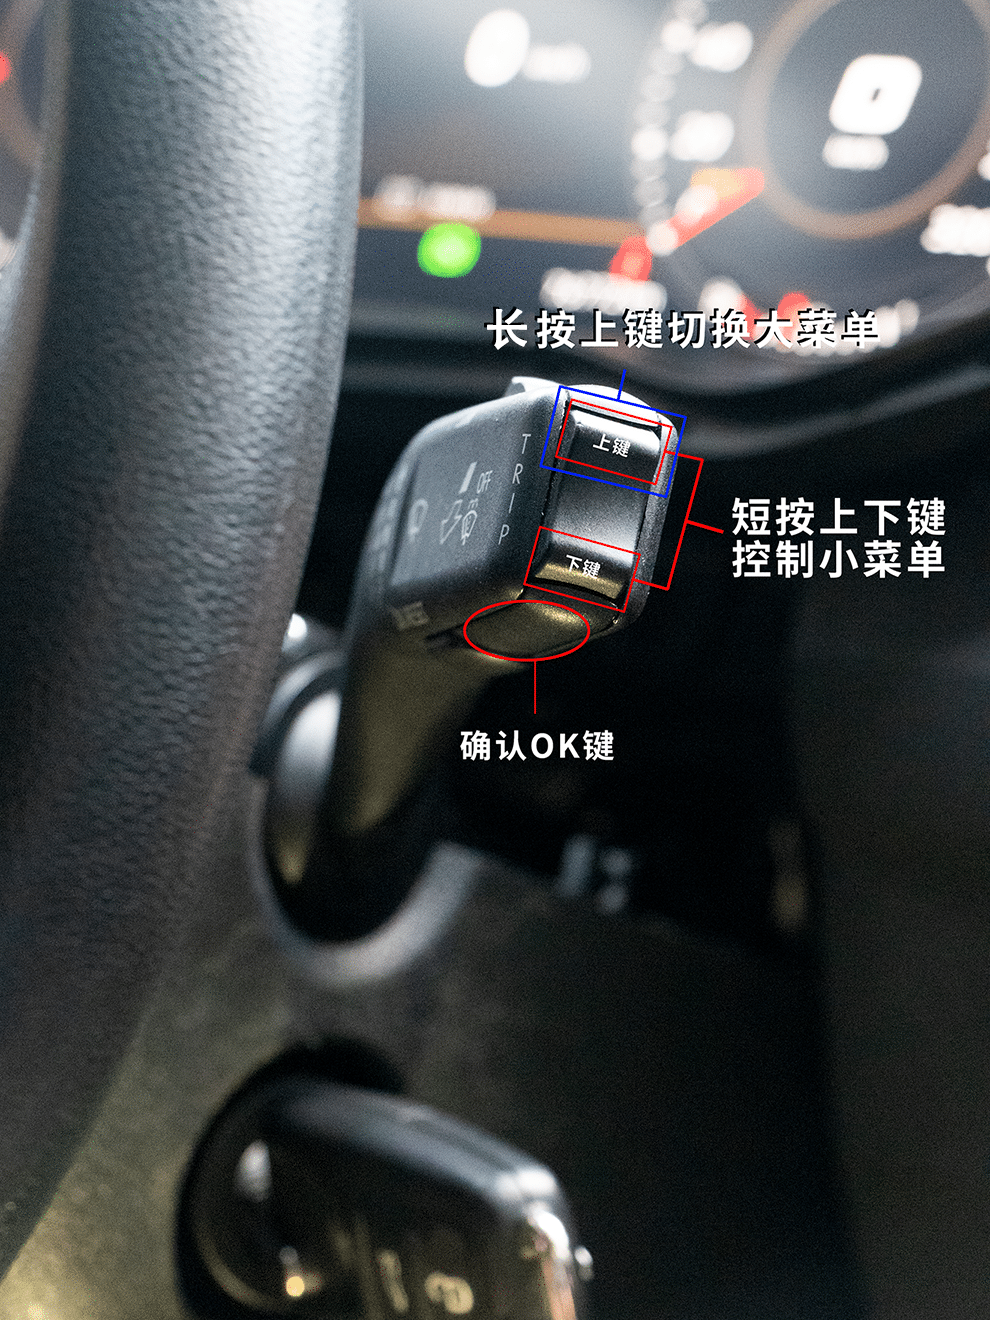
- ادخل إلى قائمة تحديد السرعة متعددة الوظائف.
- قم بتبديل وظيفتي التحذير كلتيهما إيقاف.
- عندها فقط ابدأ بإزالة مجموعة العدادات الأصلية.
فحص الإكمال: تم تجهيز مساري التحذير بينما لا تزال قائمة المجموعة الأصلية متاحة.
إزالة إطار لوحة القيادة والمجموعة الأصلية
المرحلة المادية الأولى هي الوصول المتحكم به إلى لوحة القيادة. لا تُجبر مجموعة العدادات عبر إطار لم يُحرر بالكامل.
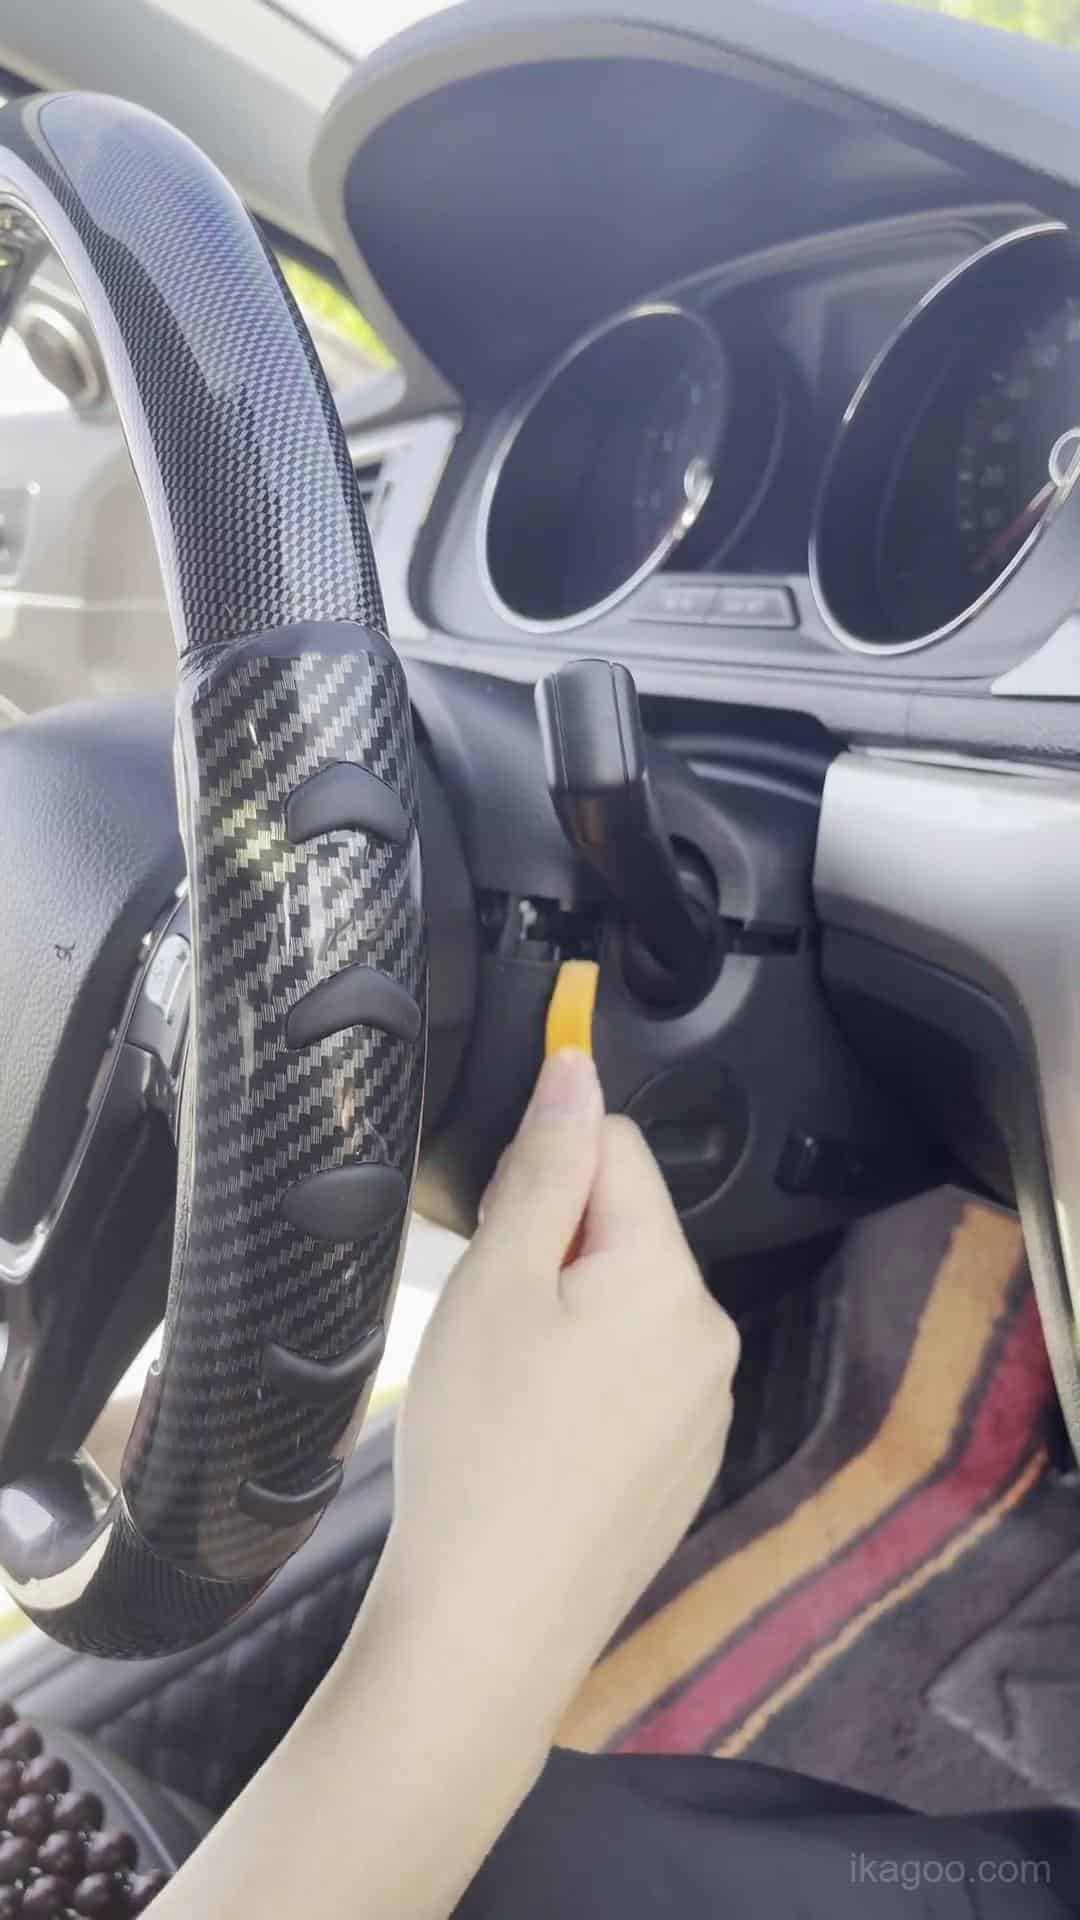
الخطوة 1. تأكد من المجموعة الميكانيكية الأصلية
قارن وجه المجموعة الأصلية وإطار لوحة القيادة المحيط وفتحة العدادات مع مسار التركيب هذا قبل إزالة أي شيء.
التقط صورة واضحة للوحة القيادة والمجموعة الأصليتين قبل البدء. يوفر هذا سجلاً مفيدًا لأي مؤشرات تحذير أو حالة موجودة في لوحة القيادة.
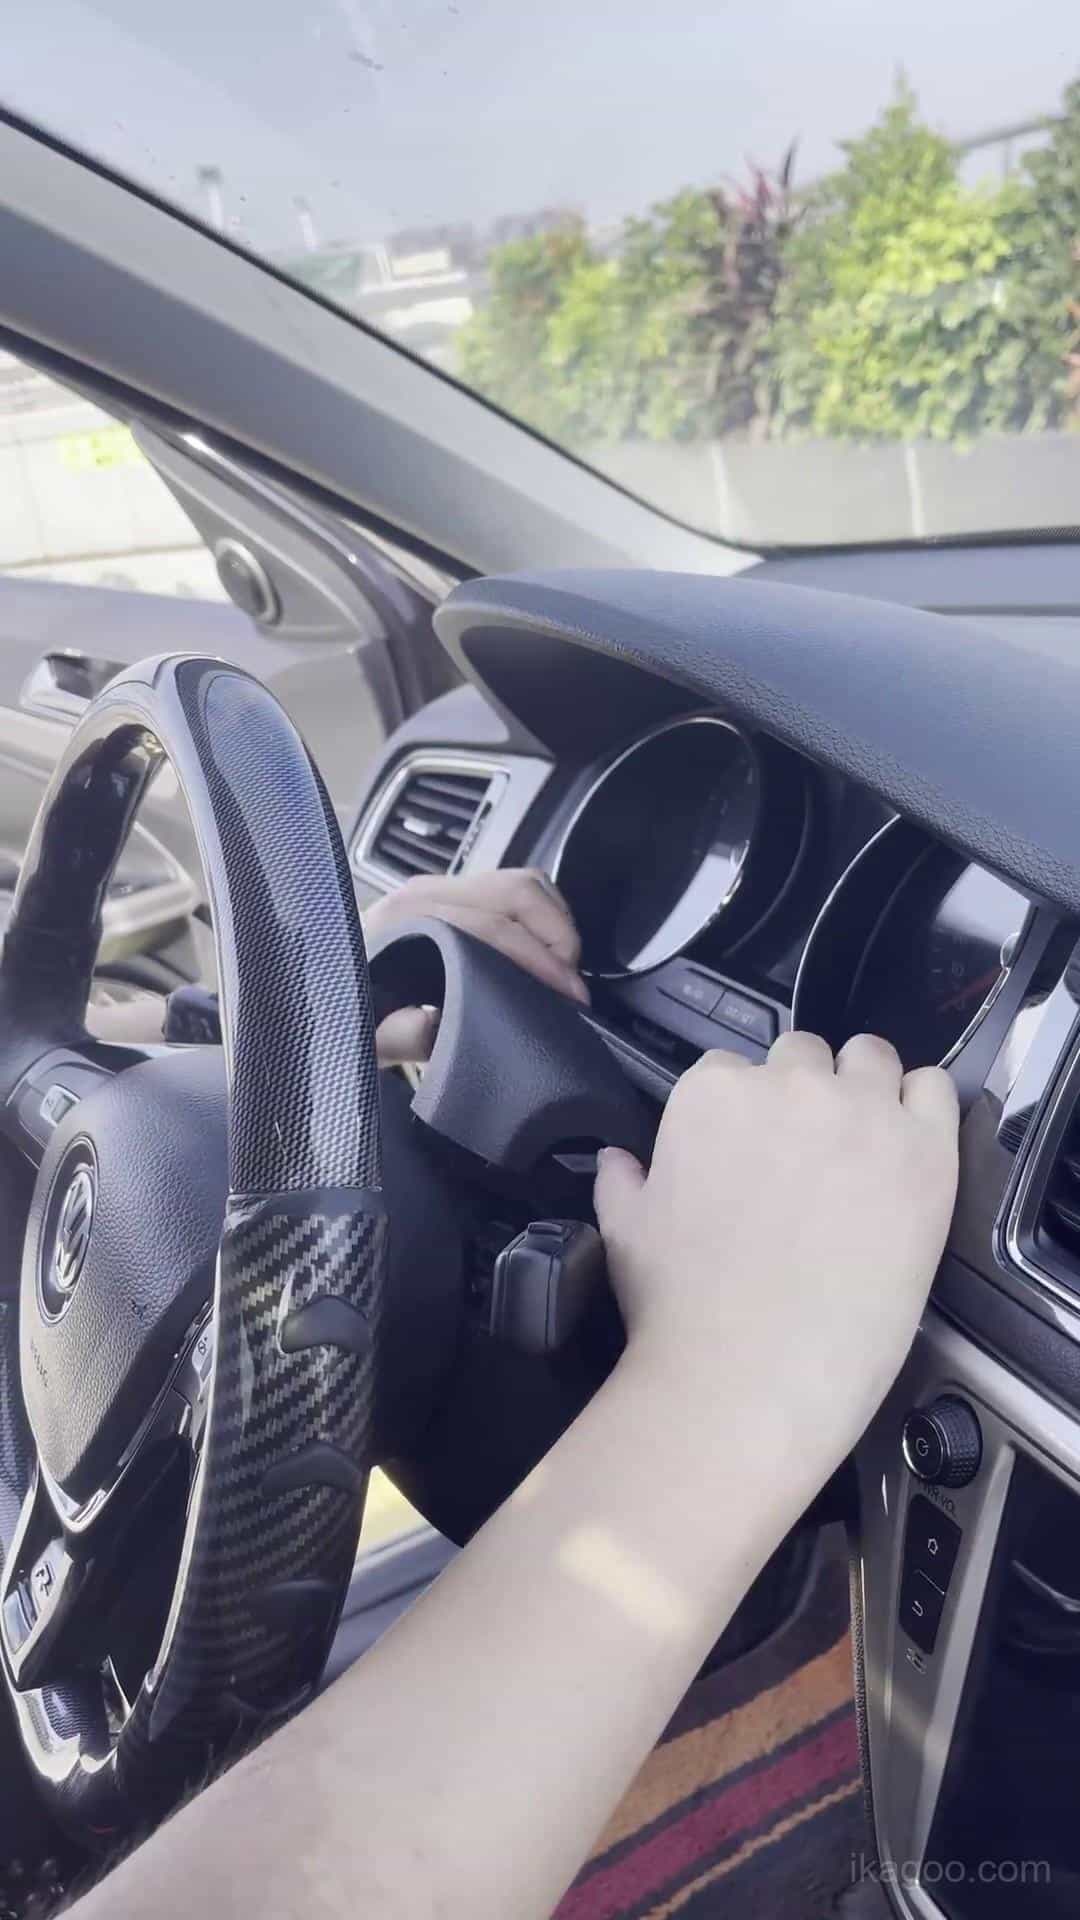
الخطوة 2. ابدأ بتحرير إطار لوحة القيادة
استخدم أداة إزالة إطار بلاستيكية وحرّر اللوحة المحيطة تدريجياً. اعمل من مفاصل اللوحة ونقاط التثبيت بدلاً من تطبيق رافعة قوية على أسطح الإطار الظاهرة.
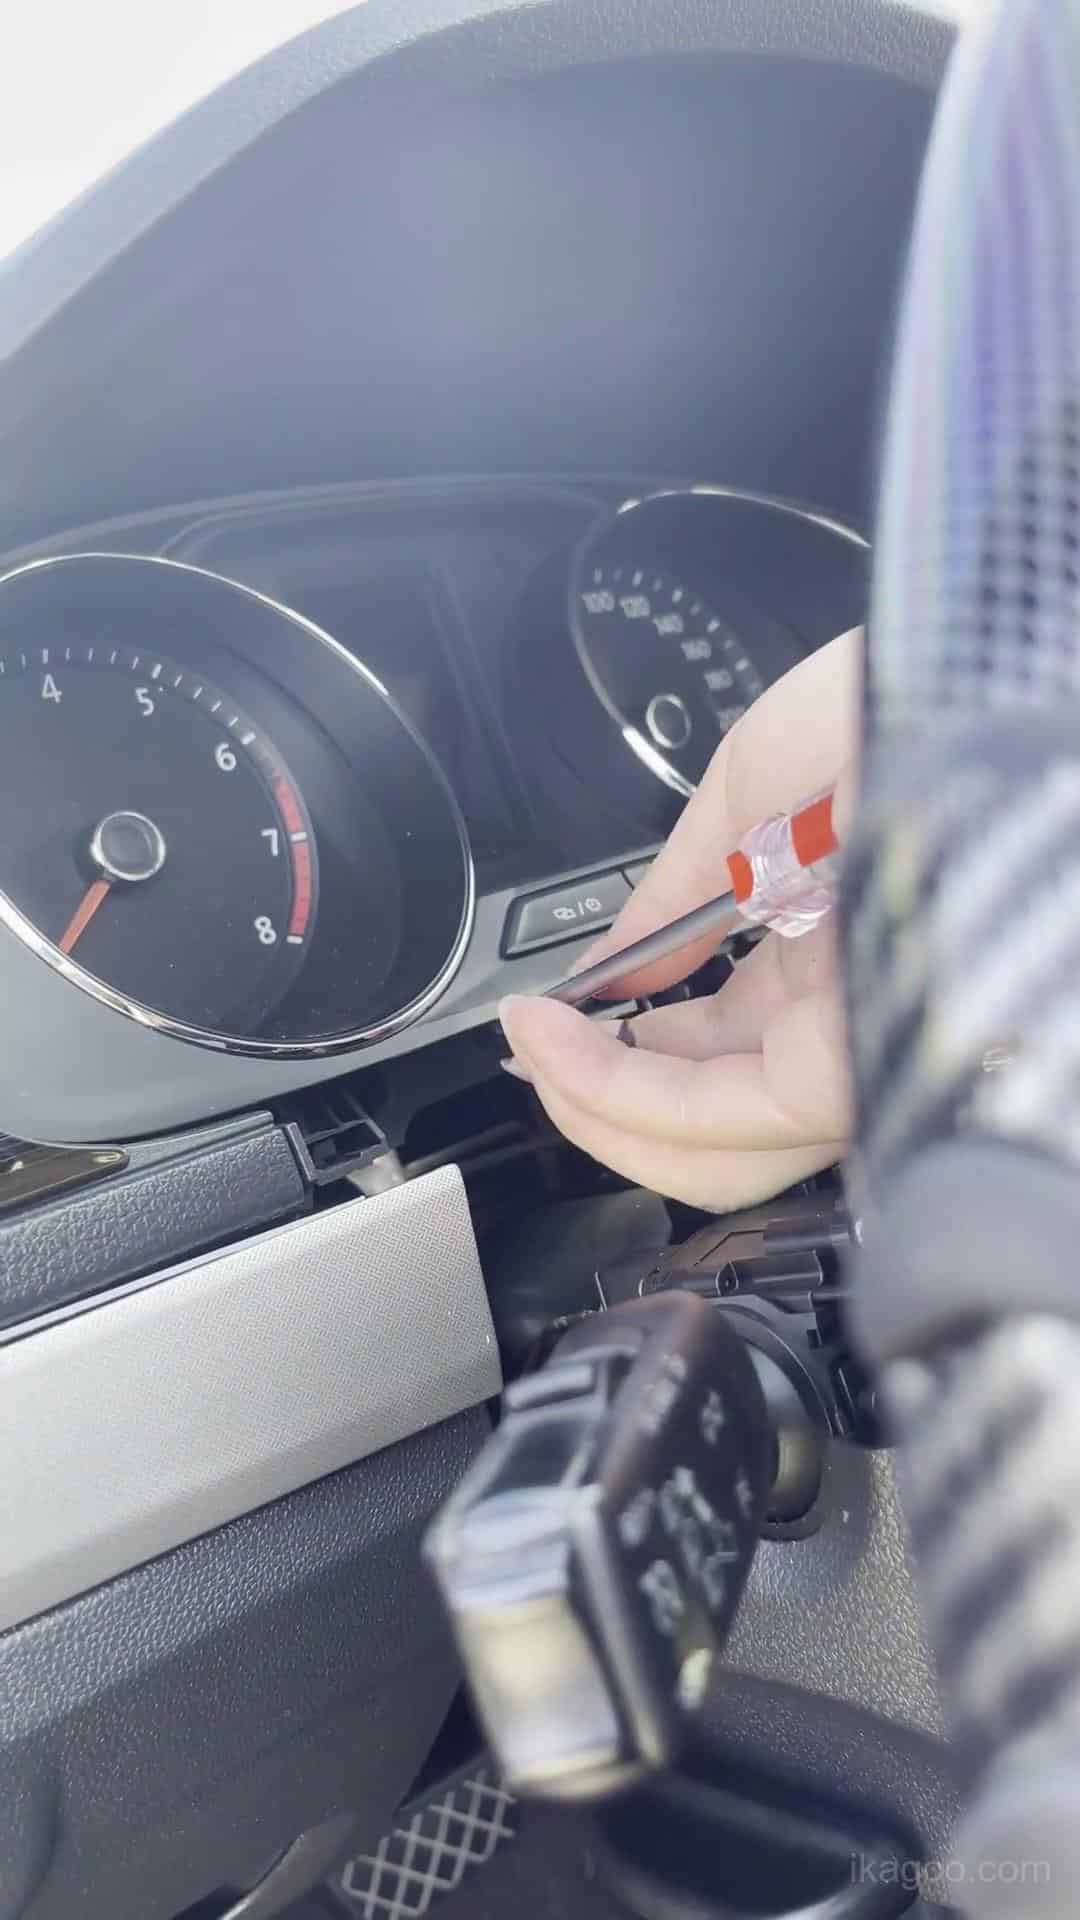
الخطوة 3. تابع فتح محيط مجموعة العدادات
حرّر الإطار المحيط بالتساوي. لا تسحب جانباً واحداً للخارج بينما يبقى الجانب المقابل مثبتاً بإحكام.
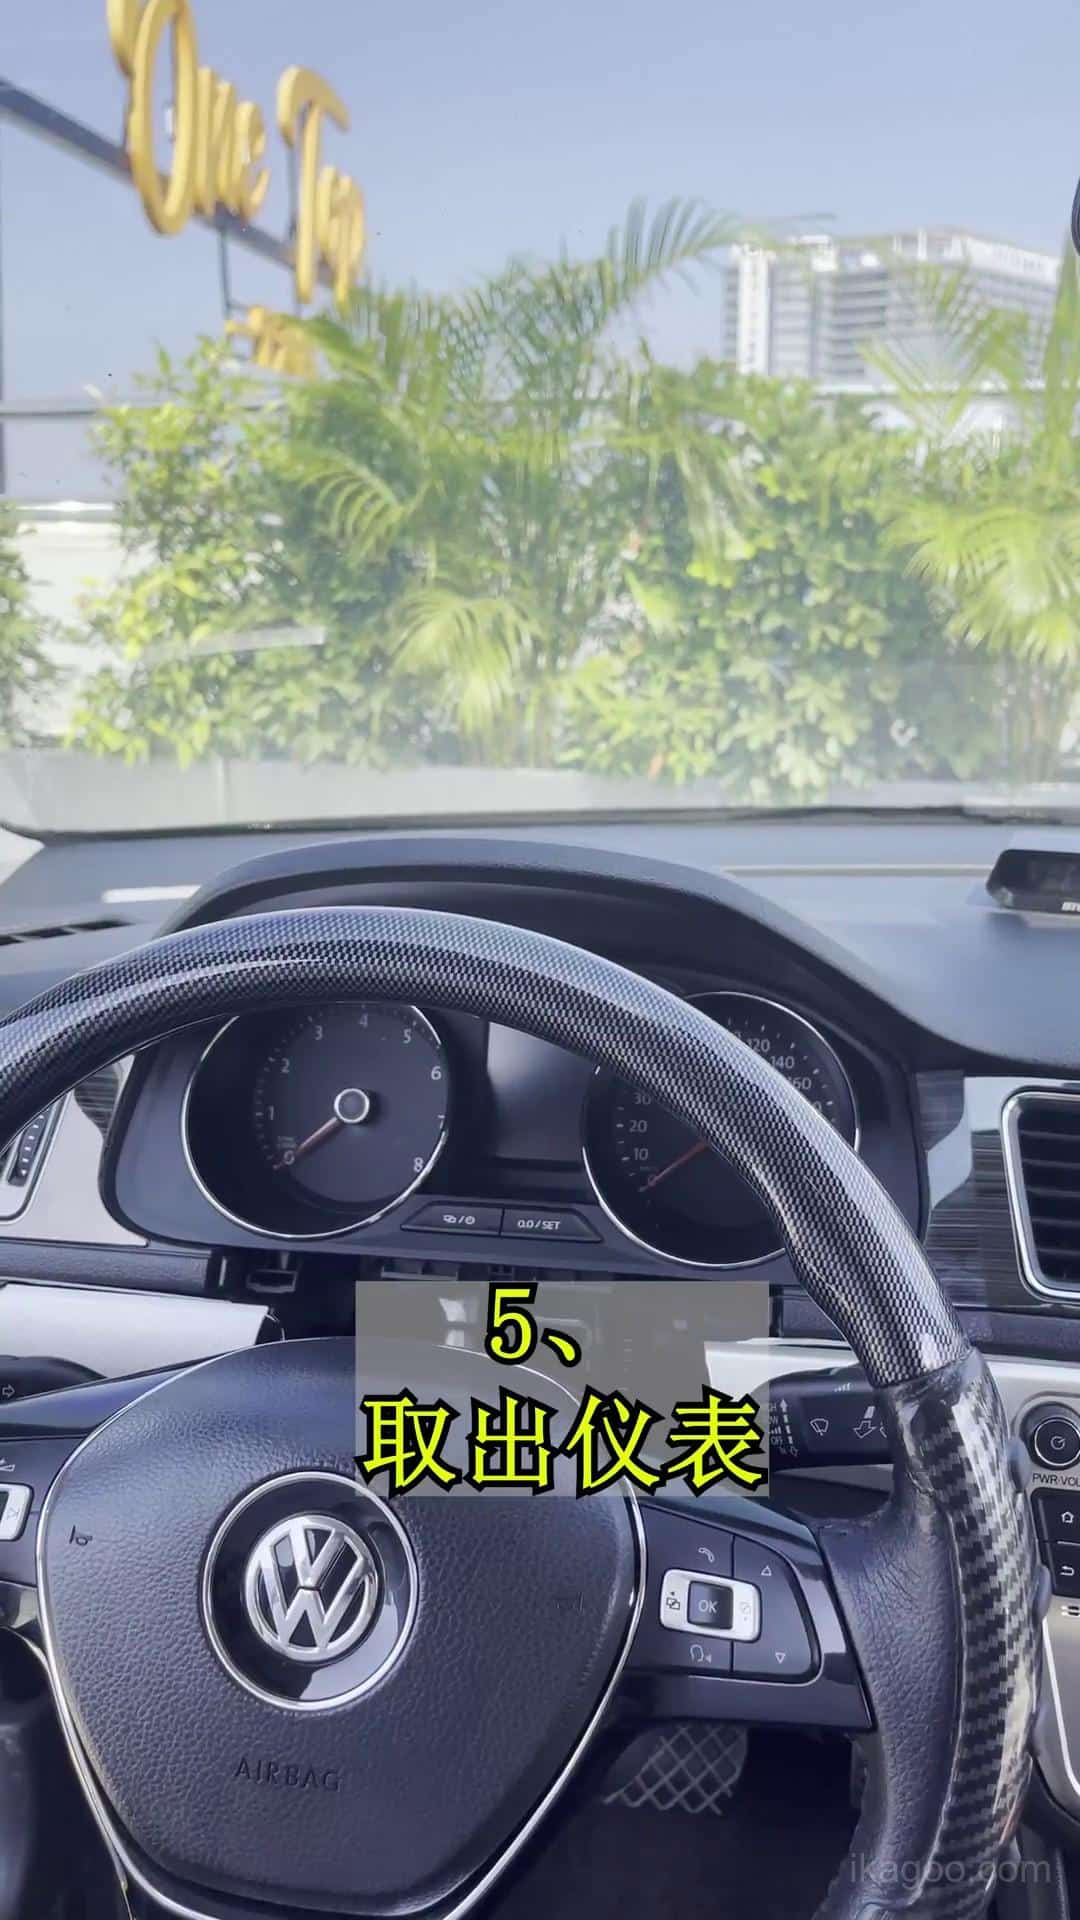
الخطوة 4. كشف مجموعة العدادات الأصلية بالكامل
أزل ما يكفي من الإطار المحيط لتتمكن المجموعة الأصلية من التحرك للأمام على طول مسار الإزالة الطبيعي دون خدش أو إجبار الإطار.
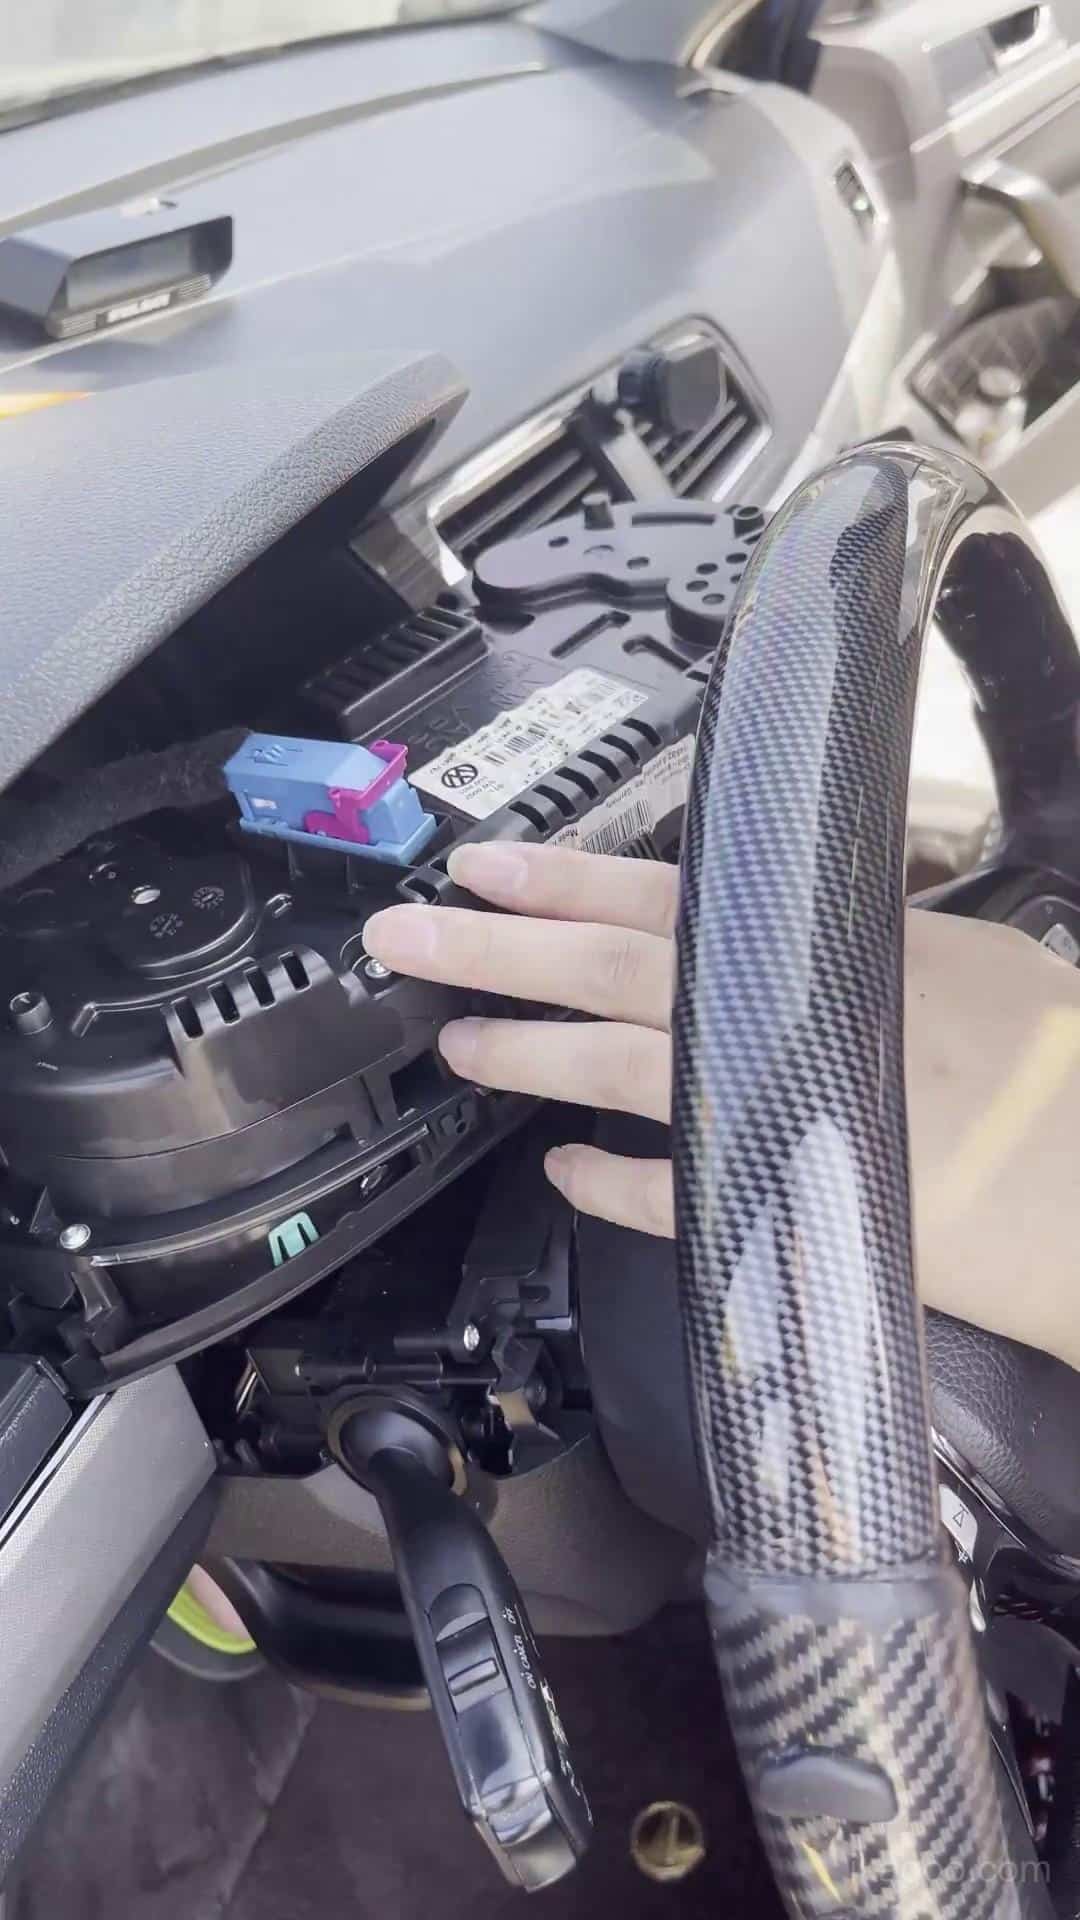
الخطوة 5. إزالة مجموعة العدادات الميكانيكية الأصلية
أحضر المجموعة للأمام بحذر وادعم وزنها أثناء فصل الموصل الأصلي. لا تدع المجموعة تتدلى من الضفيرة.
نقل اللوحة الأصلية والعمل على الطاولة
هذا هو الجزء الأكثر حساسية في تركيب مجموعة العدادات الرقمية لسيارة فولكس فاجن لافيدا 2013-2017 لأن الإلكترونيات الأصلية المطلوبة يجب الاحتفاظ بها وتركيبها بشكل صحيح.
الحماية من الكهرباء الساكنة: فرّغ الشحنات الساكنة من جسمك قبل لمس اللوحة الإلكترونية الأصلية واحمل الألواح الإلكترونية من حوافها فقط.
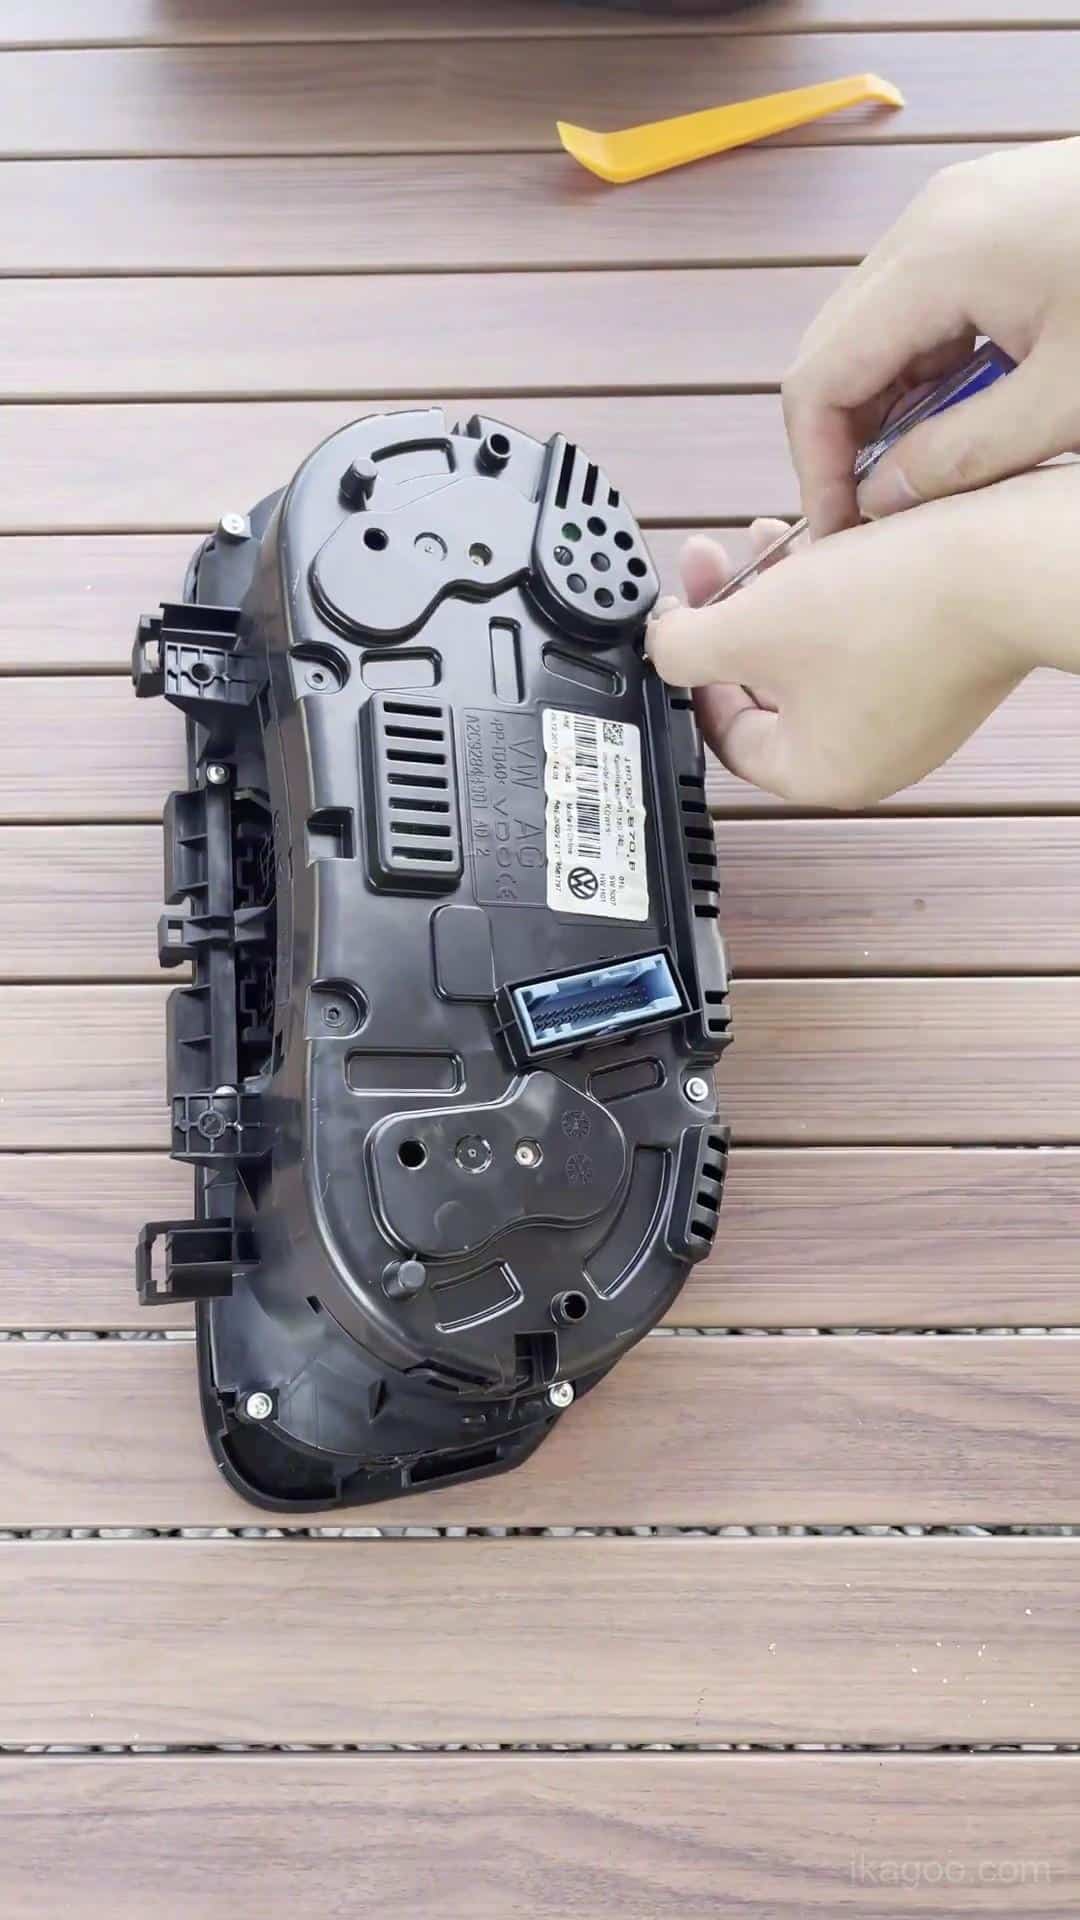
الخطوة 6. انقل المجموعة الأصلية إلى طاولة نظيفة
نفّذ العمل الداخلي على سطح نظيف مبطن. نظّم البراغي والمكونات المفكوكة قبل فتح الهيكل.
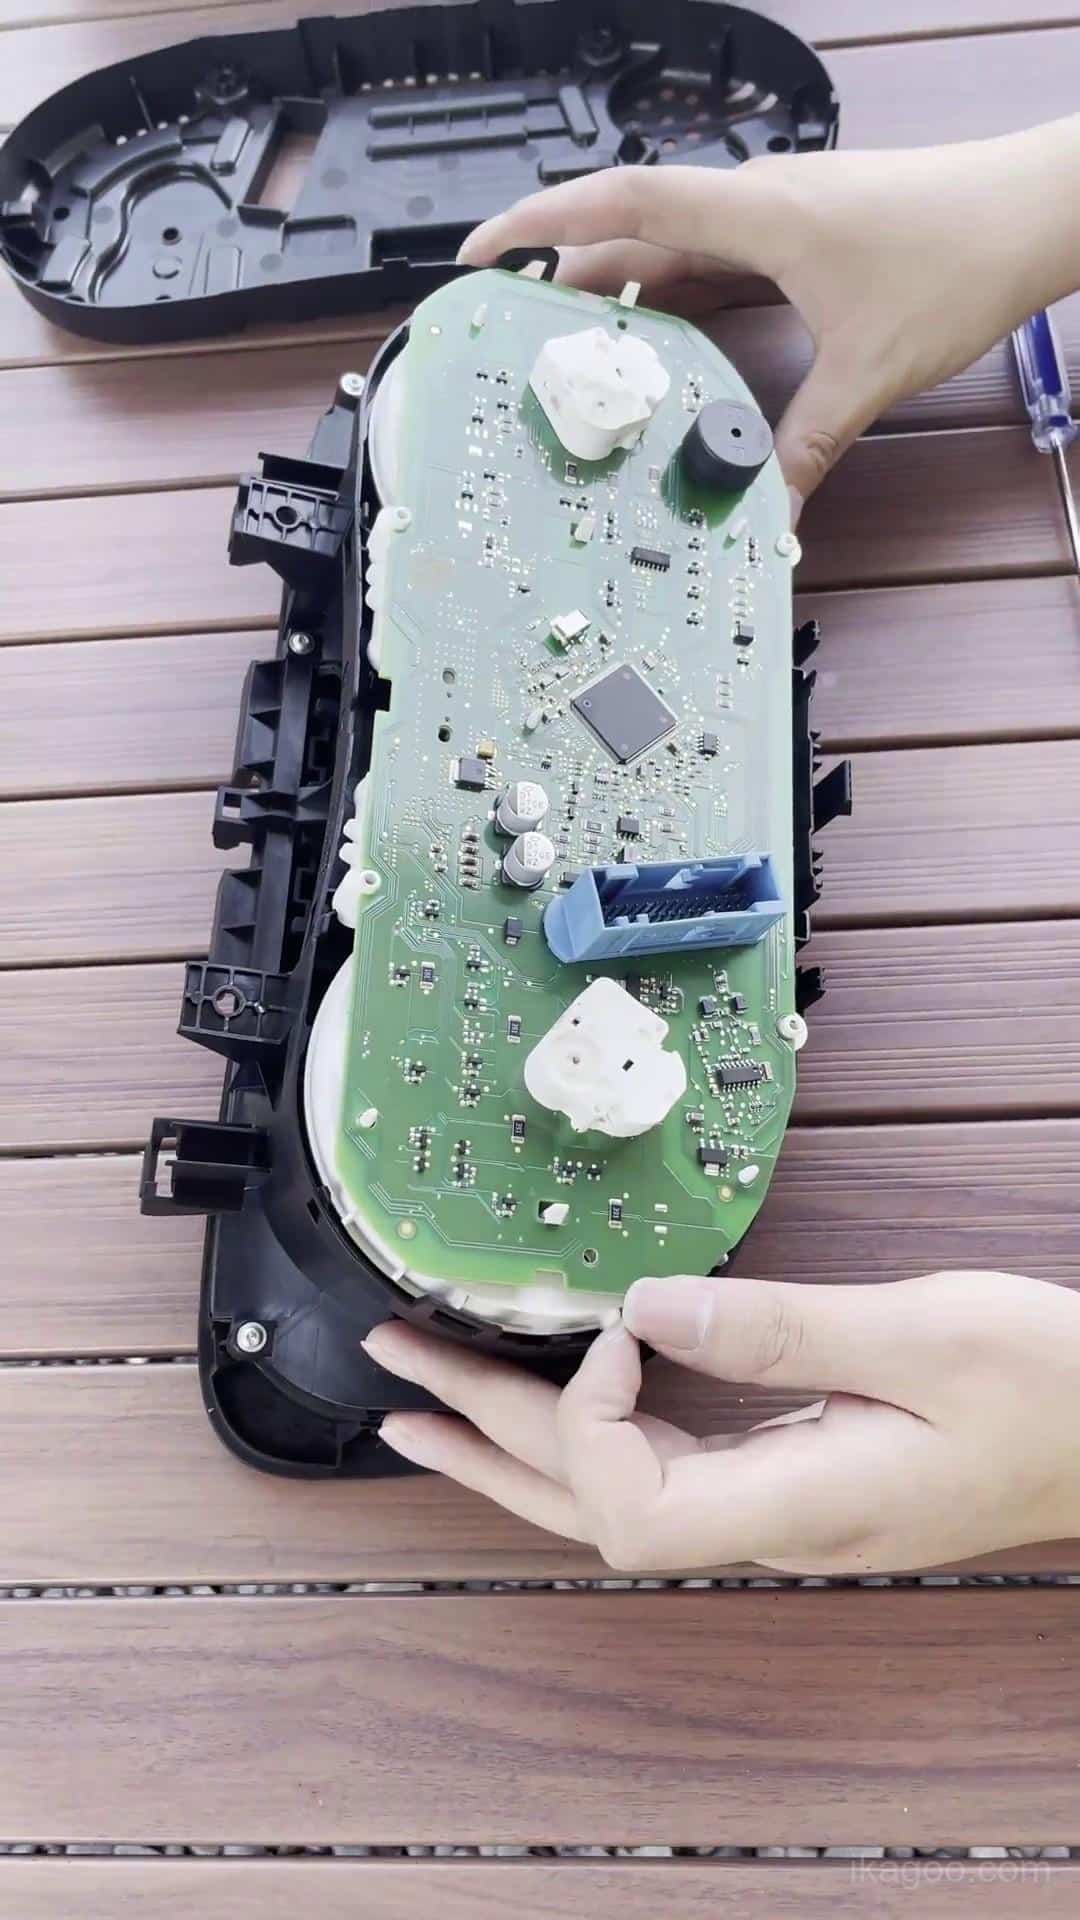
الخطوة 7. افتح غلاف العدادات الأصلي
حرّر مشابك الهيكل والمثبتات بشكل منهجي. إذا لم ينفصل الهيكل بشكل طبيعي، حدد نقطة التثبيت المتبقية بدلاً من إجباره.
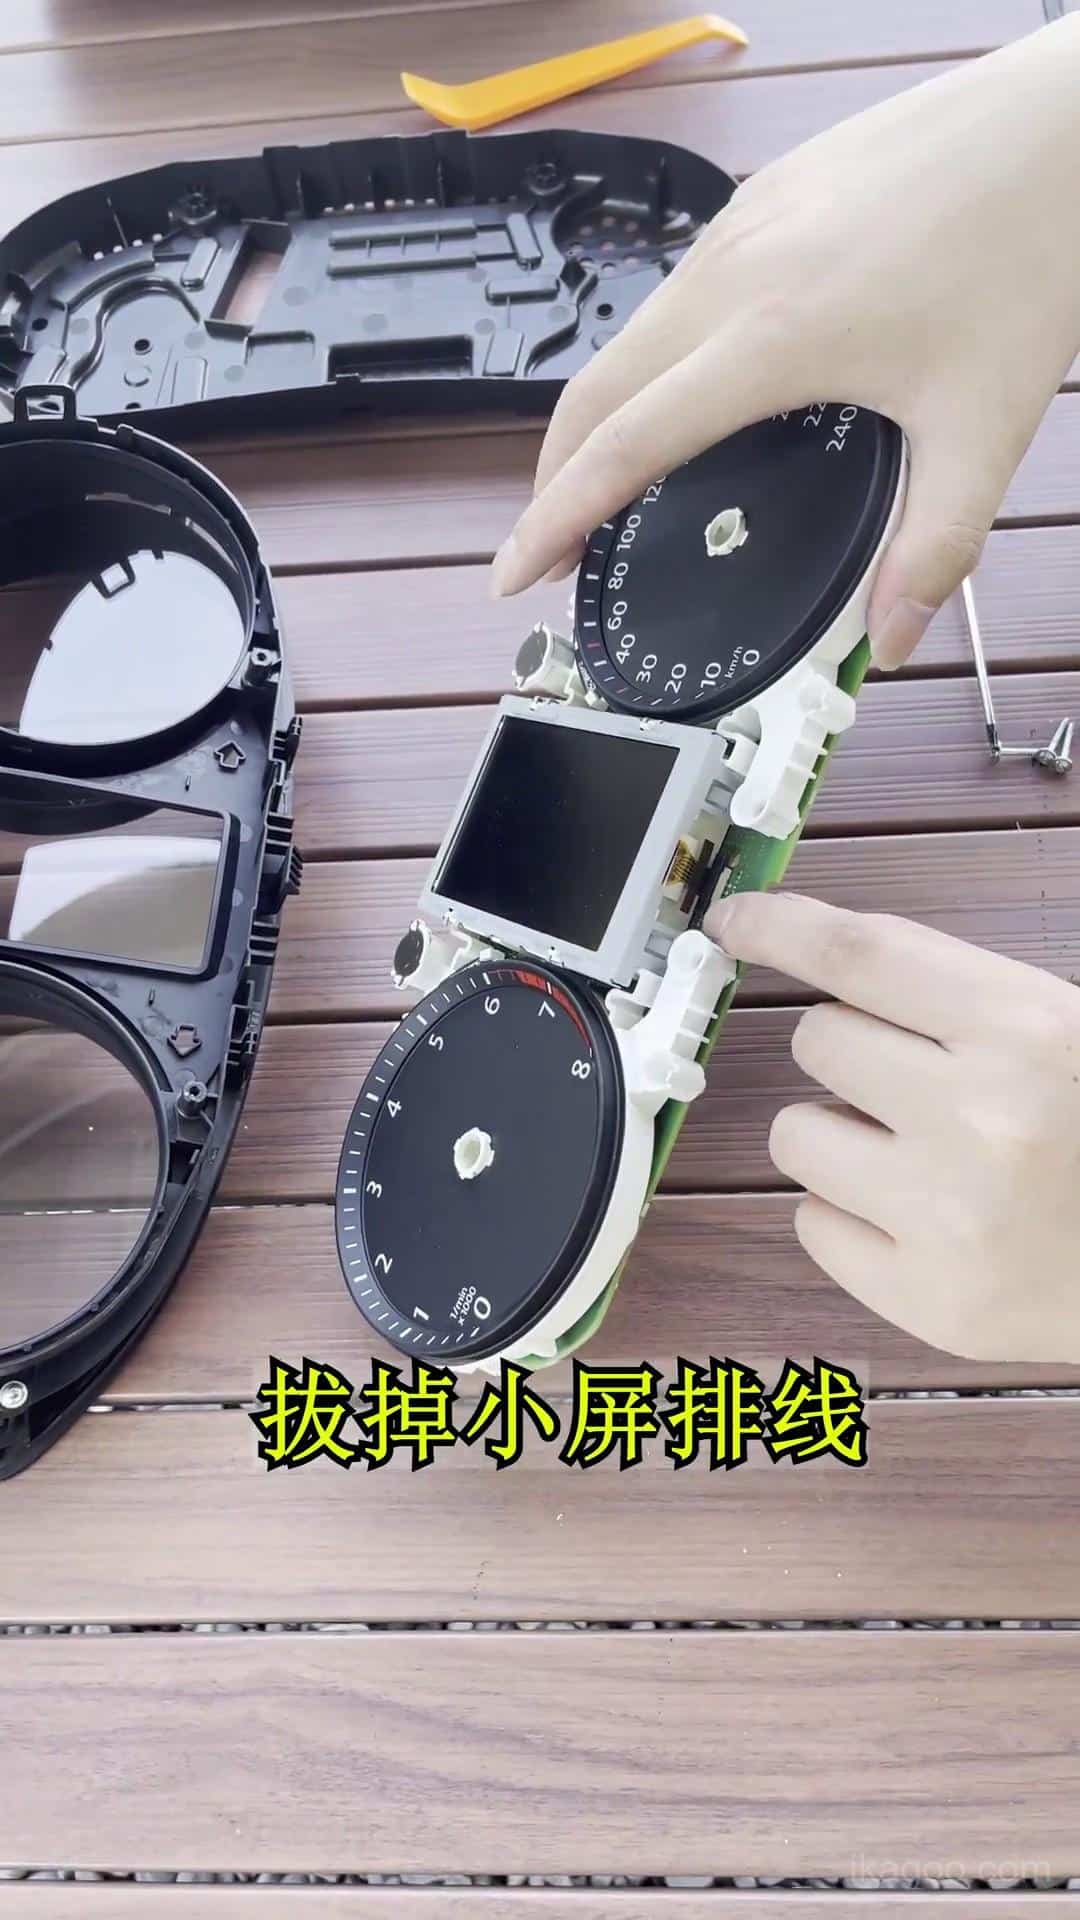
الخطوة 8. الوصول إلى الإلكترونيات الأصلية
حدد مسار اللوحة الأصلية المطلوب قبل فصل المكونات. تجنب لمس مكونات اللوحة الإلكترونية أو نقاط التلامس المكشوفة مباشرة.
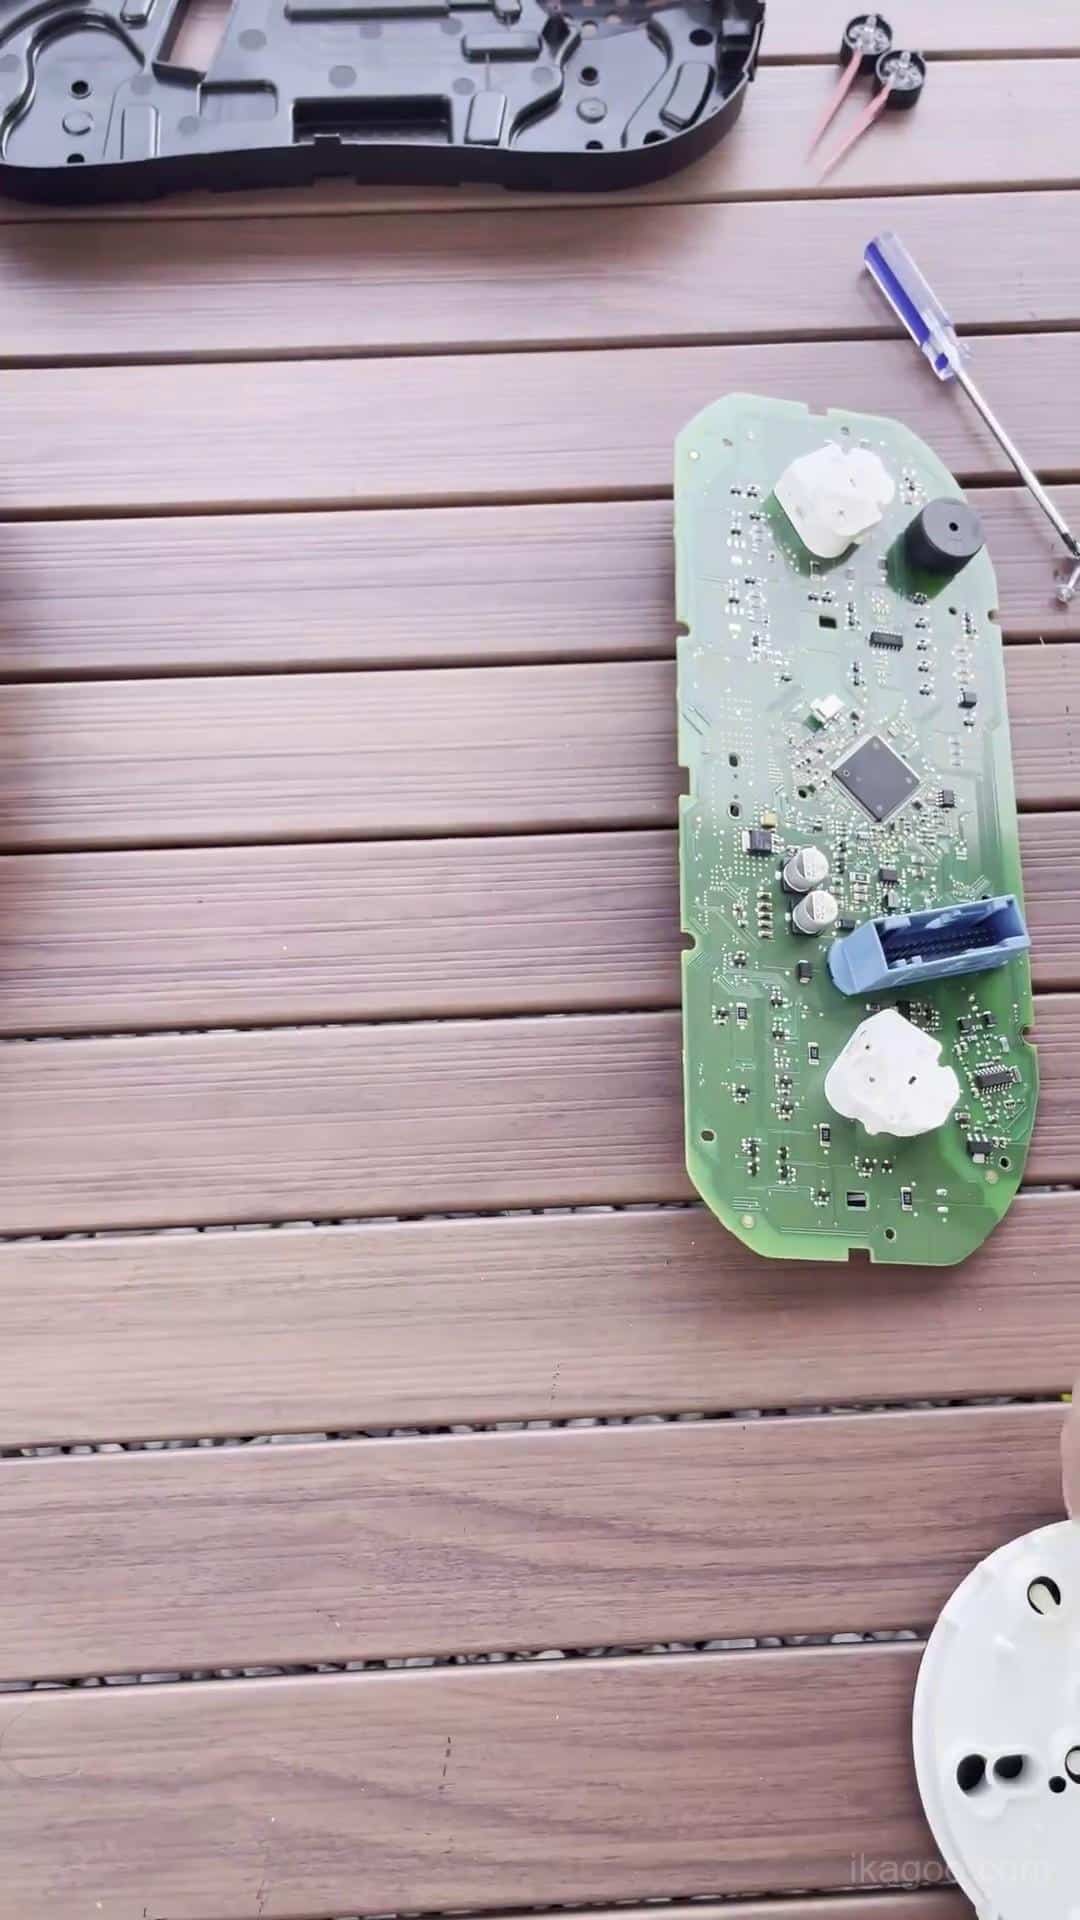
الخطوة 9. نقل الإلكترونيات الأصلية المطلوبة
انقل مكونات الإلكترونيات الأصلية المطلوب الاحتفاظ بها إلى مجموعة العدادات الرقمية المطورة وضعها بشكل طبيعي في مواقع التثبيت المخصصة لها.
تأكد من أن جميع الموصلات مثبتة بالكامل ولا يوجد كابل محتجز أسفل اللوحة.
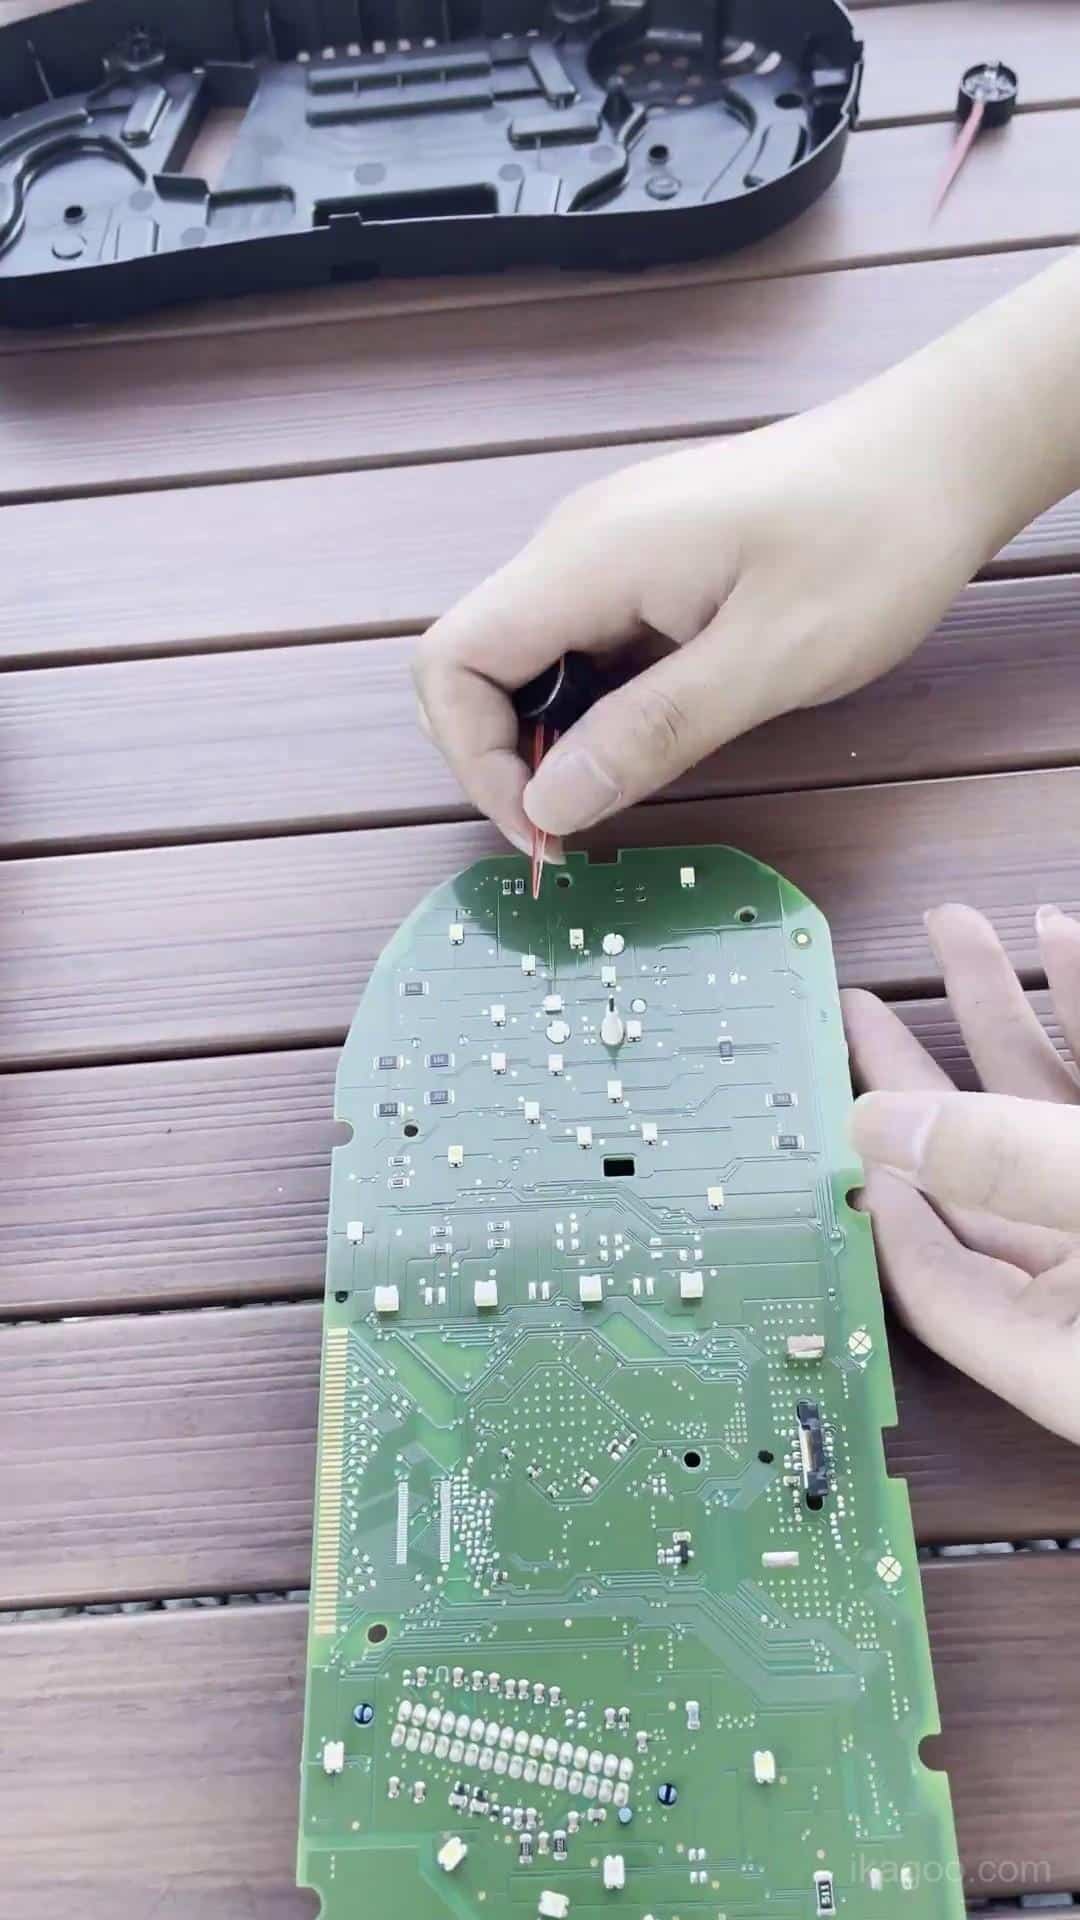
الخطوة 10. تحقق من الأجهزة الأصلية المحتفظ بها
قبل إغلاق الهيكل الجديد، افحص اللوحة المحتفظ بها والموصلات ومسار الكابل وصافرة العدادات الأصلية.
هذه أيضًا هي النقطة الصحيحة لتحديد ما إذا كانت المجموعة الأصلية تحتوي على اللوحة الإضافية الصغيرة الموضحة أدناه.
افحص اللوحة الإضافية الصغيرة
تحتوي بعض المجموعات الميكانيكية الأصلية ذات المواصفات الأعلى على لوحة دوائر إضافية صغيرة خلف الشاشة الأصلية. وهي غير موجودة في كل مجموعة Lavida.
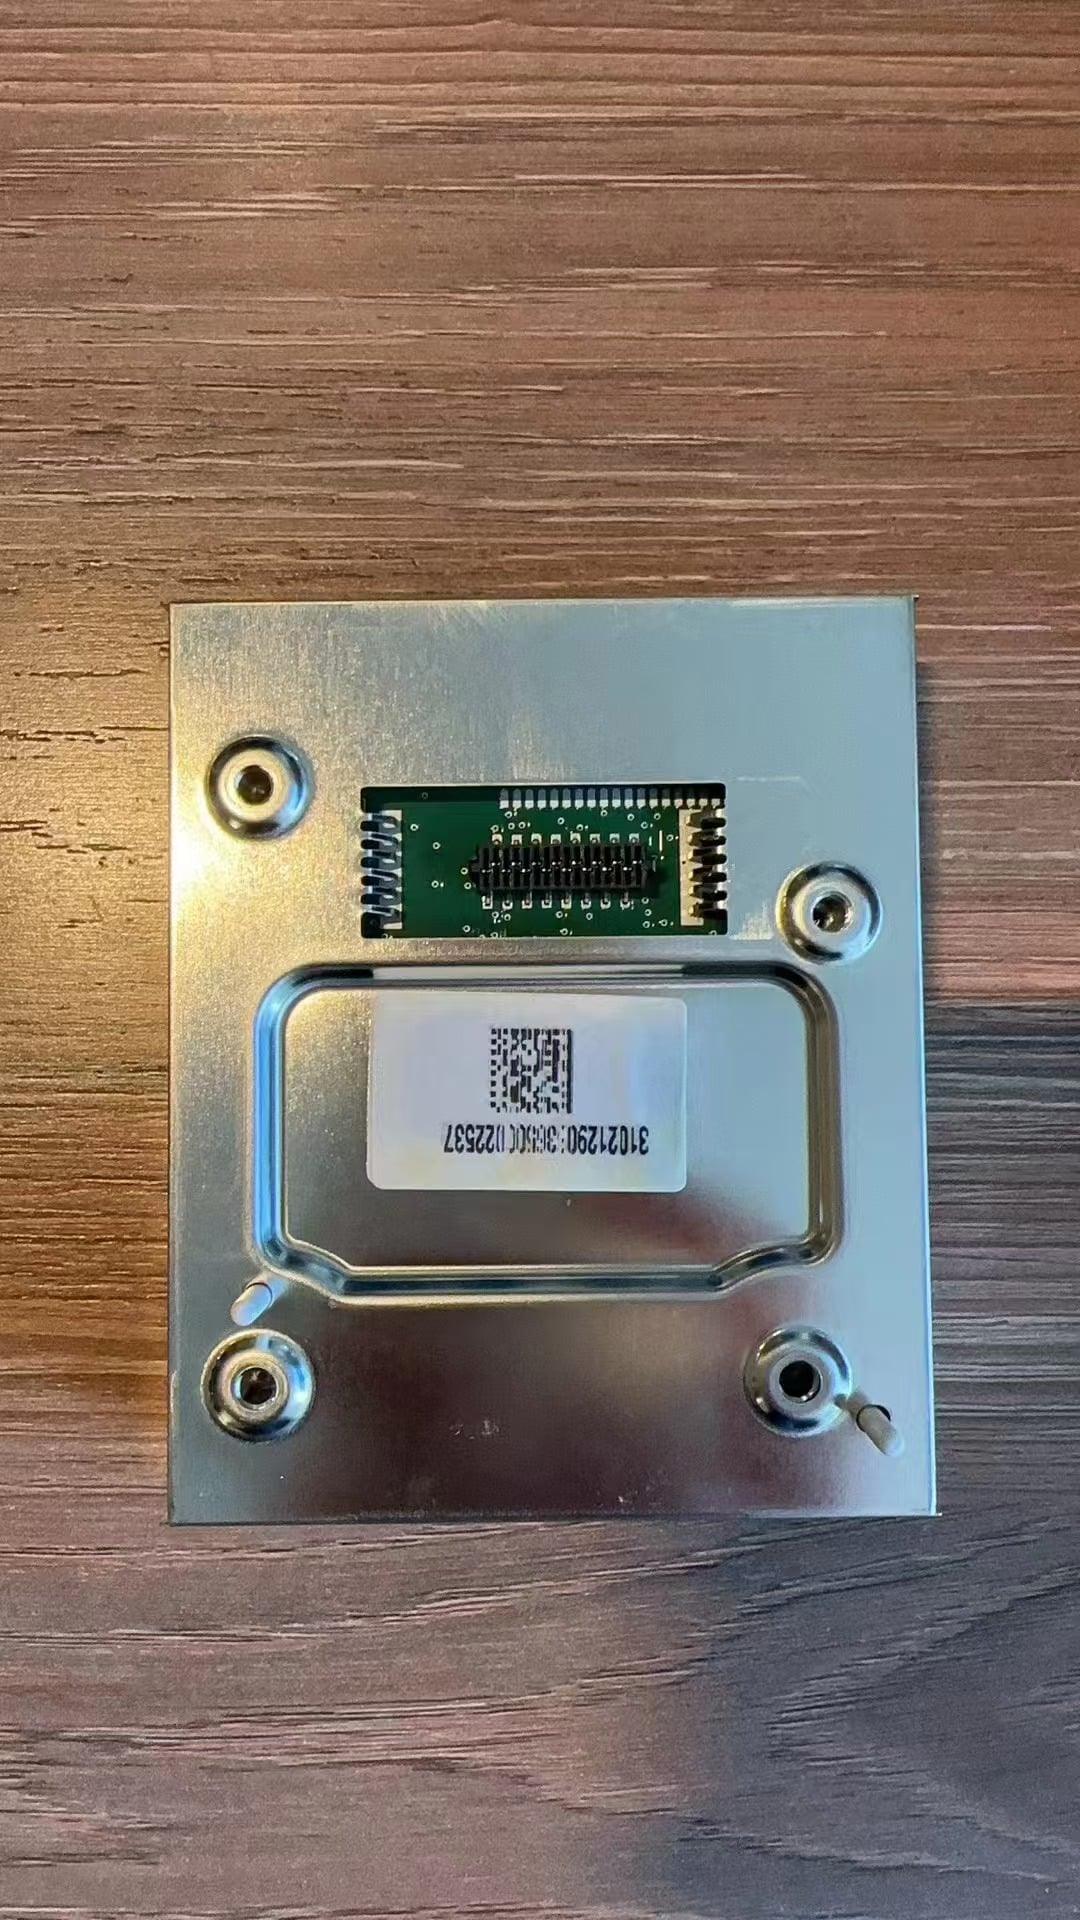
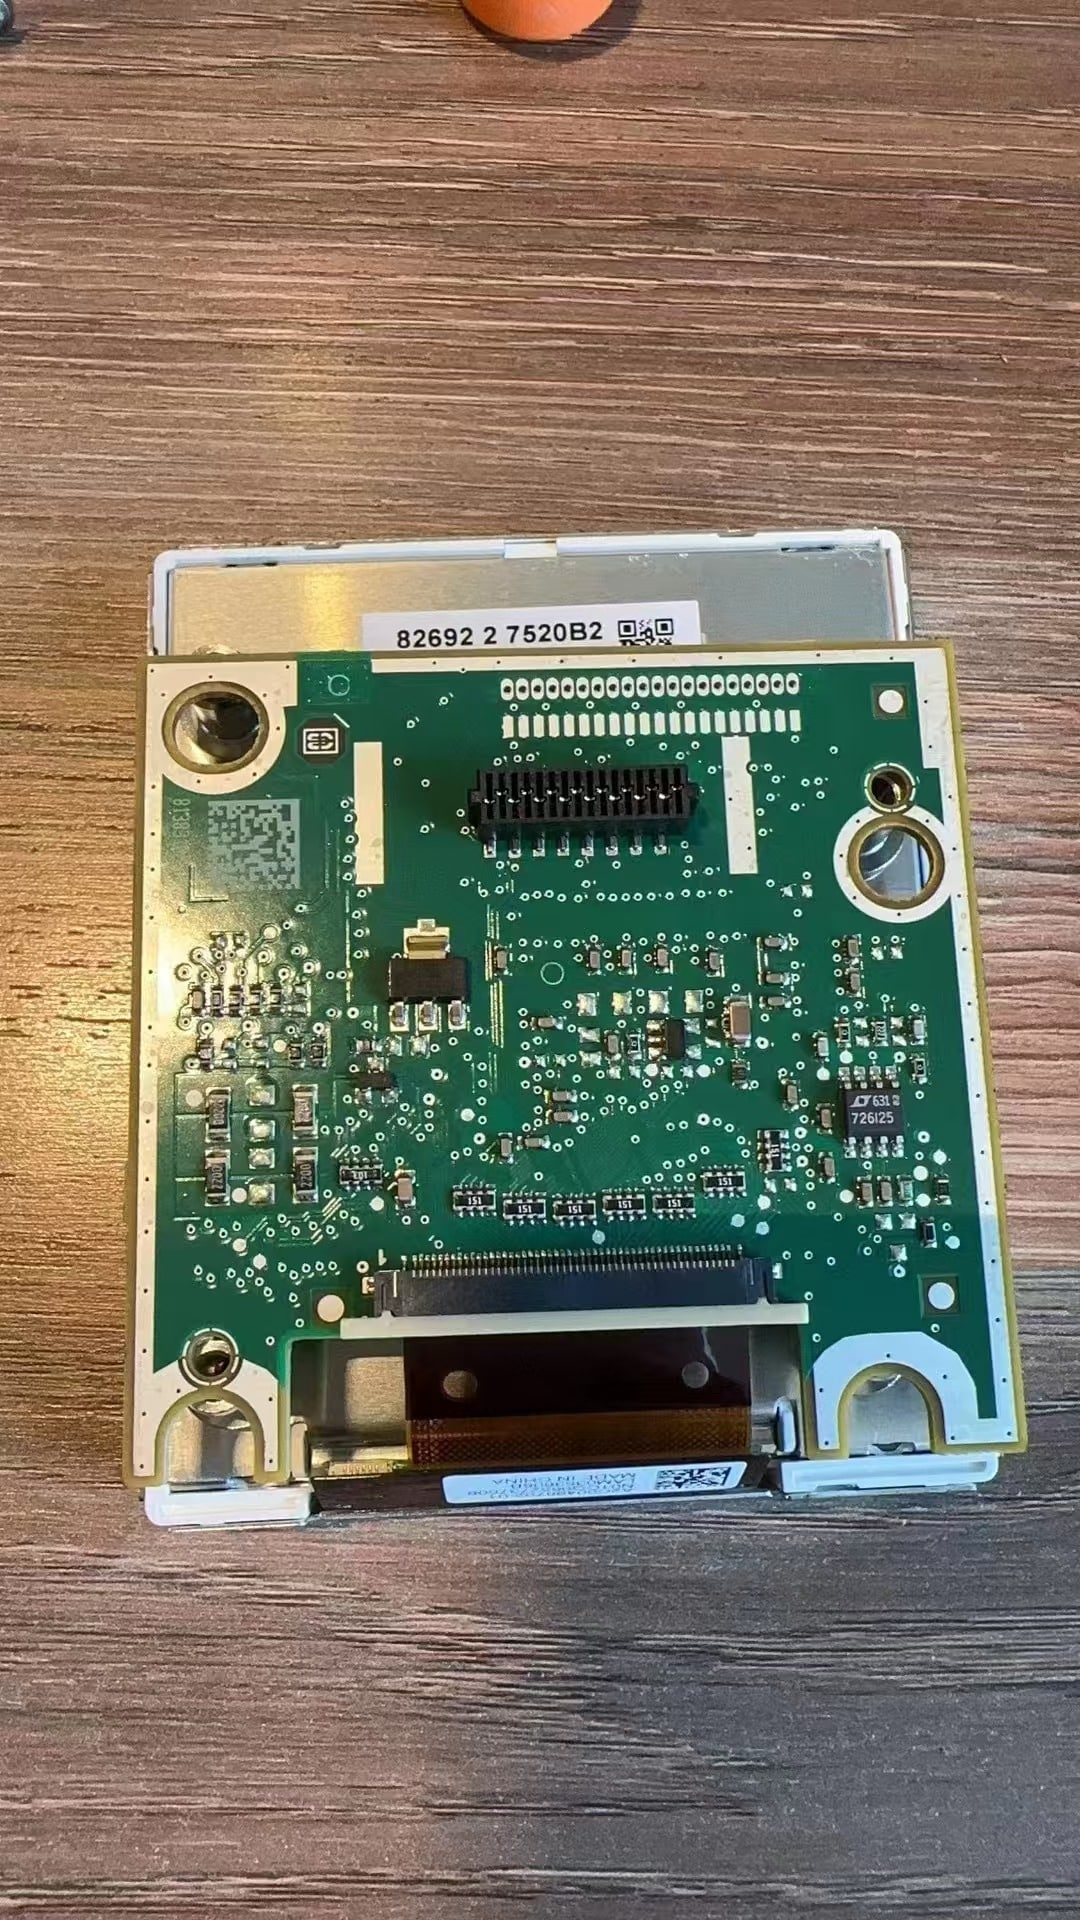
إذا كانت المجموعة الأصلية تحتوي على هذه اللوحة، فانقلها وثبّتها بشكل صحيح. وإذا لم تكن المجموعة الأصلية تحتوي على اللوحة، فلا حاجة لتركيب لوحة إضافية.
فحص حاسم: عندما تحتوي المجموعة الأصلية على هذه اللوحة، فإن إغفالها أو تركها غير محكمة قد يساهم في أخطاء مستوى الوقود أو تحذيرات أعطال العدادات.
شرح اللوحة الإضافية
مرجع تركيب اللوحة الإضافية
إعادة تجميع المجموعة الرقمية وتمديد USB
بعد فحص الإلكترونيات المحتفظ بها، أعد تجميع المجموعة الرقمية وجهّزها لتركيبها مرة أخرى في لوحة القيادة.
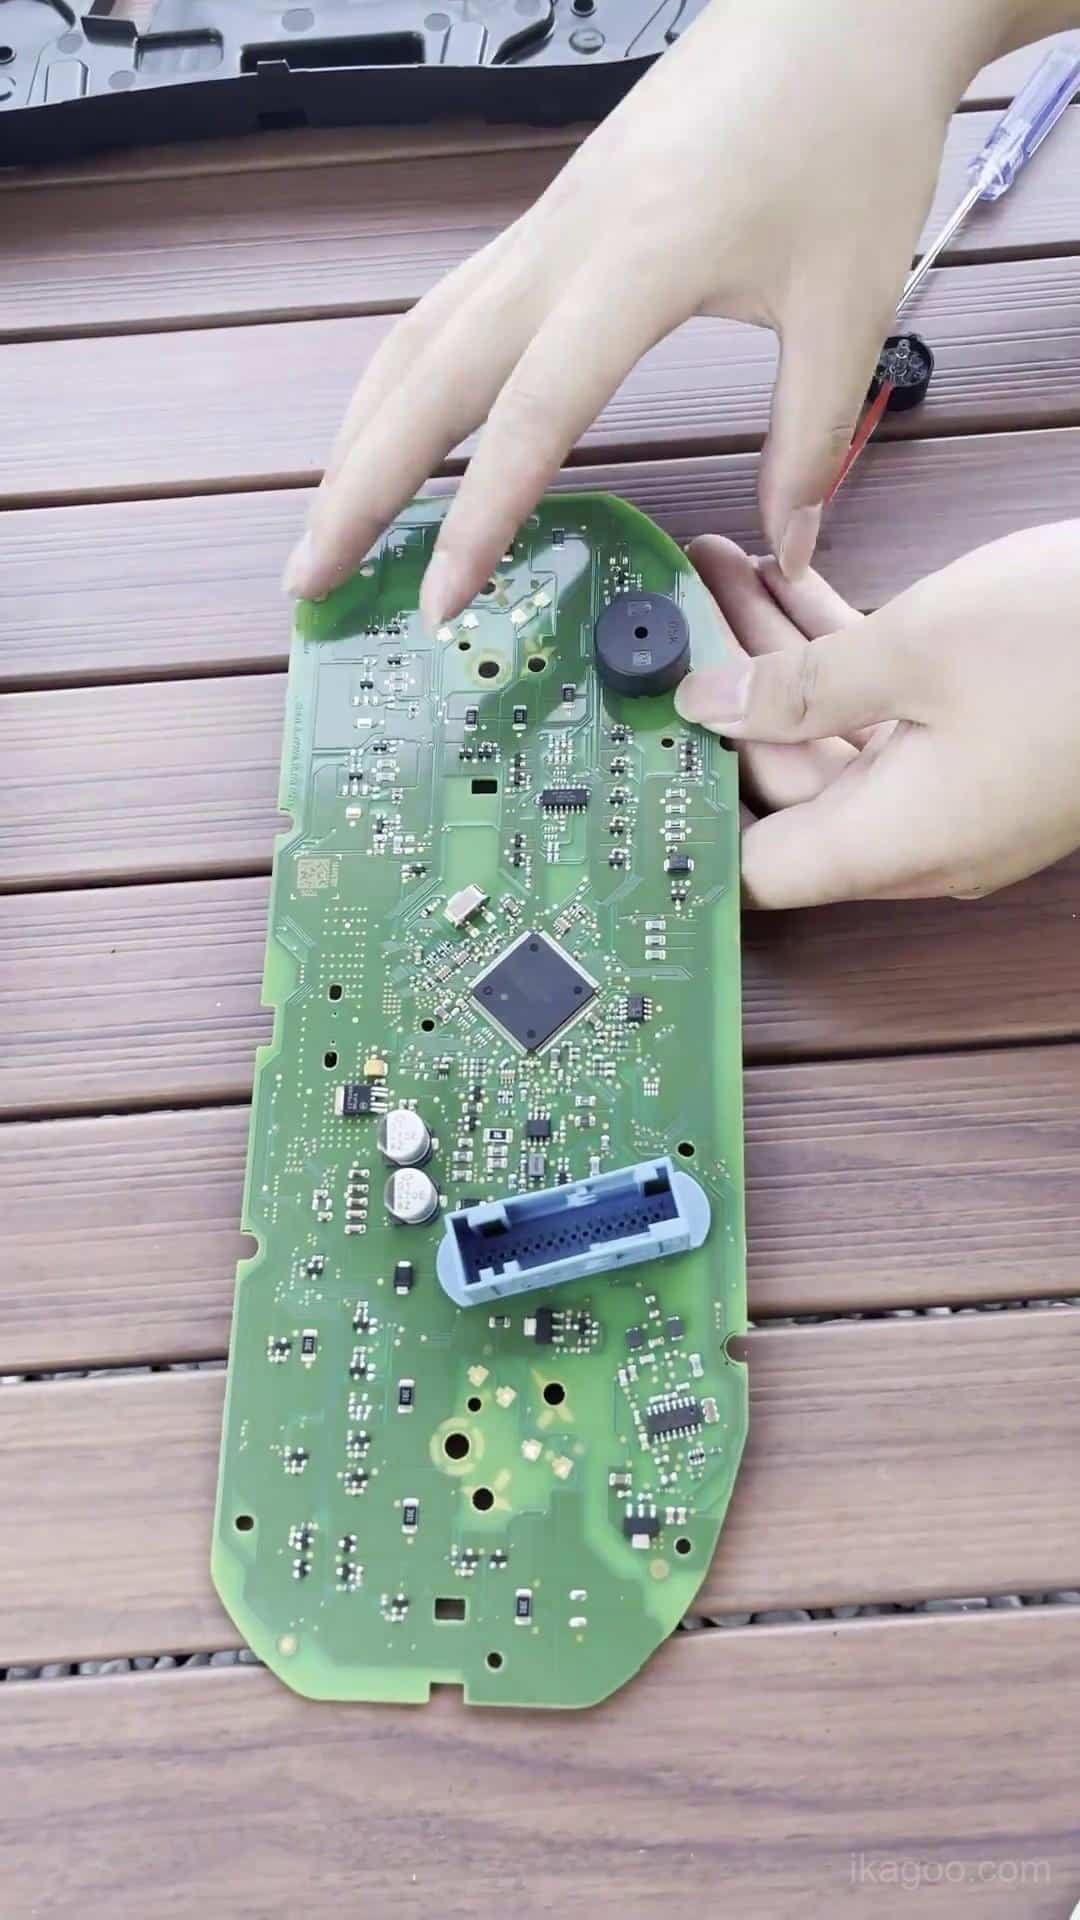
الخطوة 11. أعد تجميع المجموعة الرقمية
أغلق الهيكل بالتساوي حول المحيط. اضغط فقط على حواف الهيكل الإنشائية ولا تضغط مباشرة على سطح شاشة LCD أبدًا.
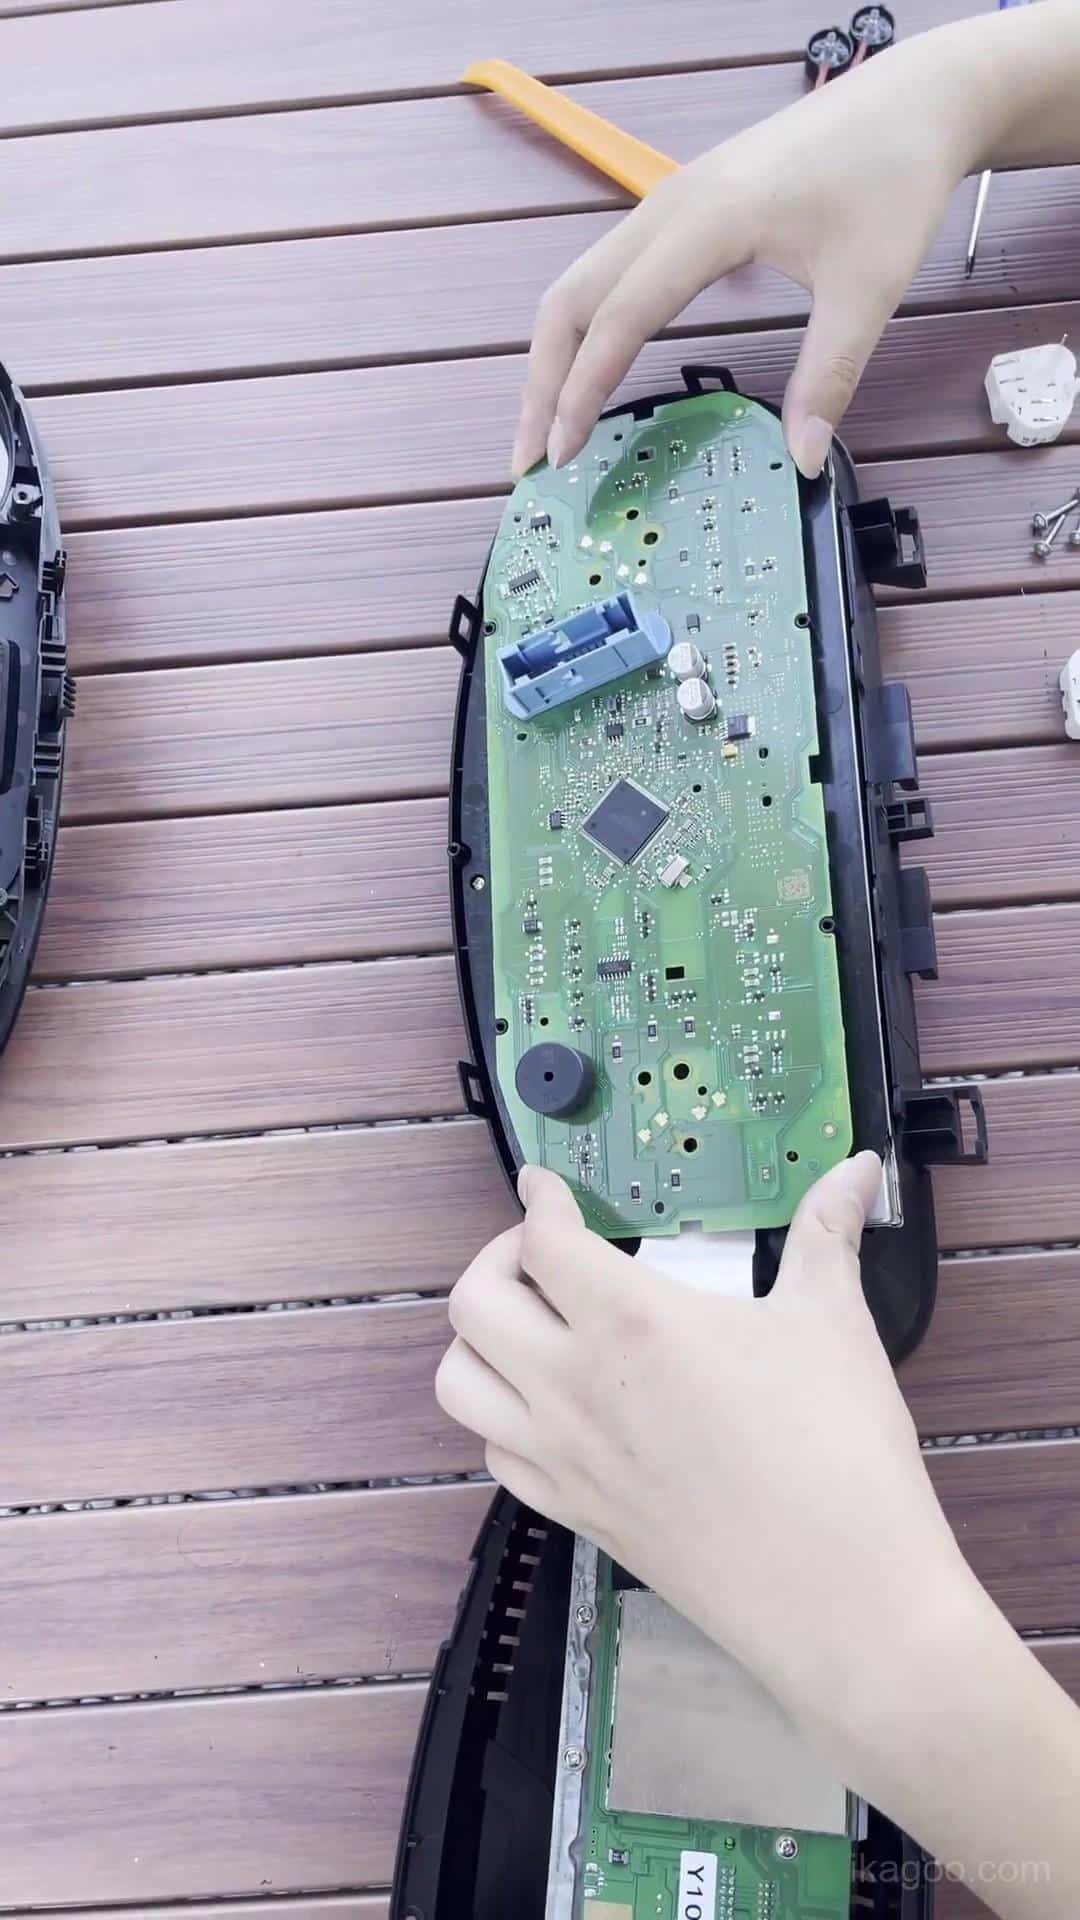
الخطوة 12. افحص هيكل المجموعة المكتمل
افحص خط لحام الهيكل بالكامل وتأكد من بقاء الإلكترونيات المحتفظ بها والصفير والشرائط والكابلات في مواضعها الصحيحة.
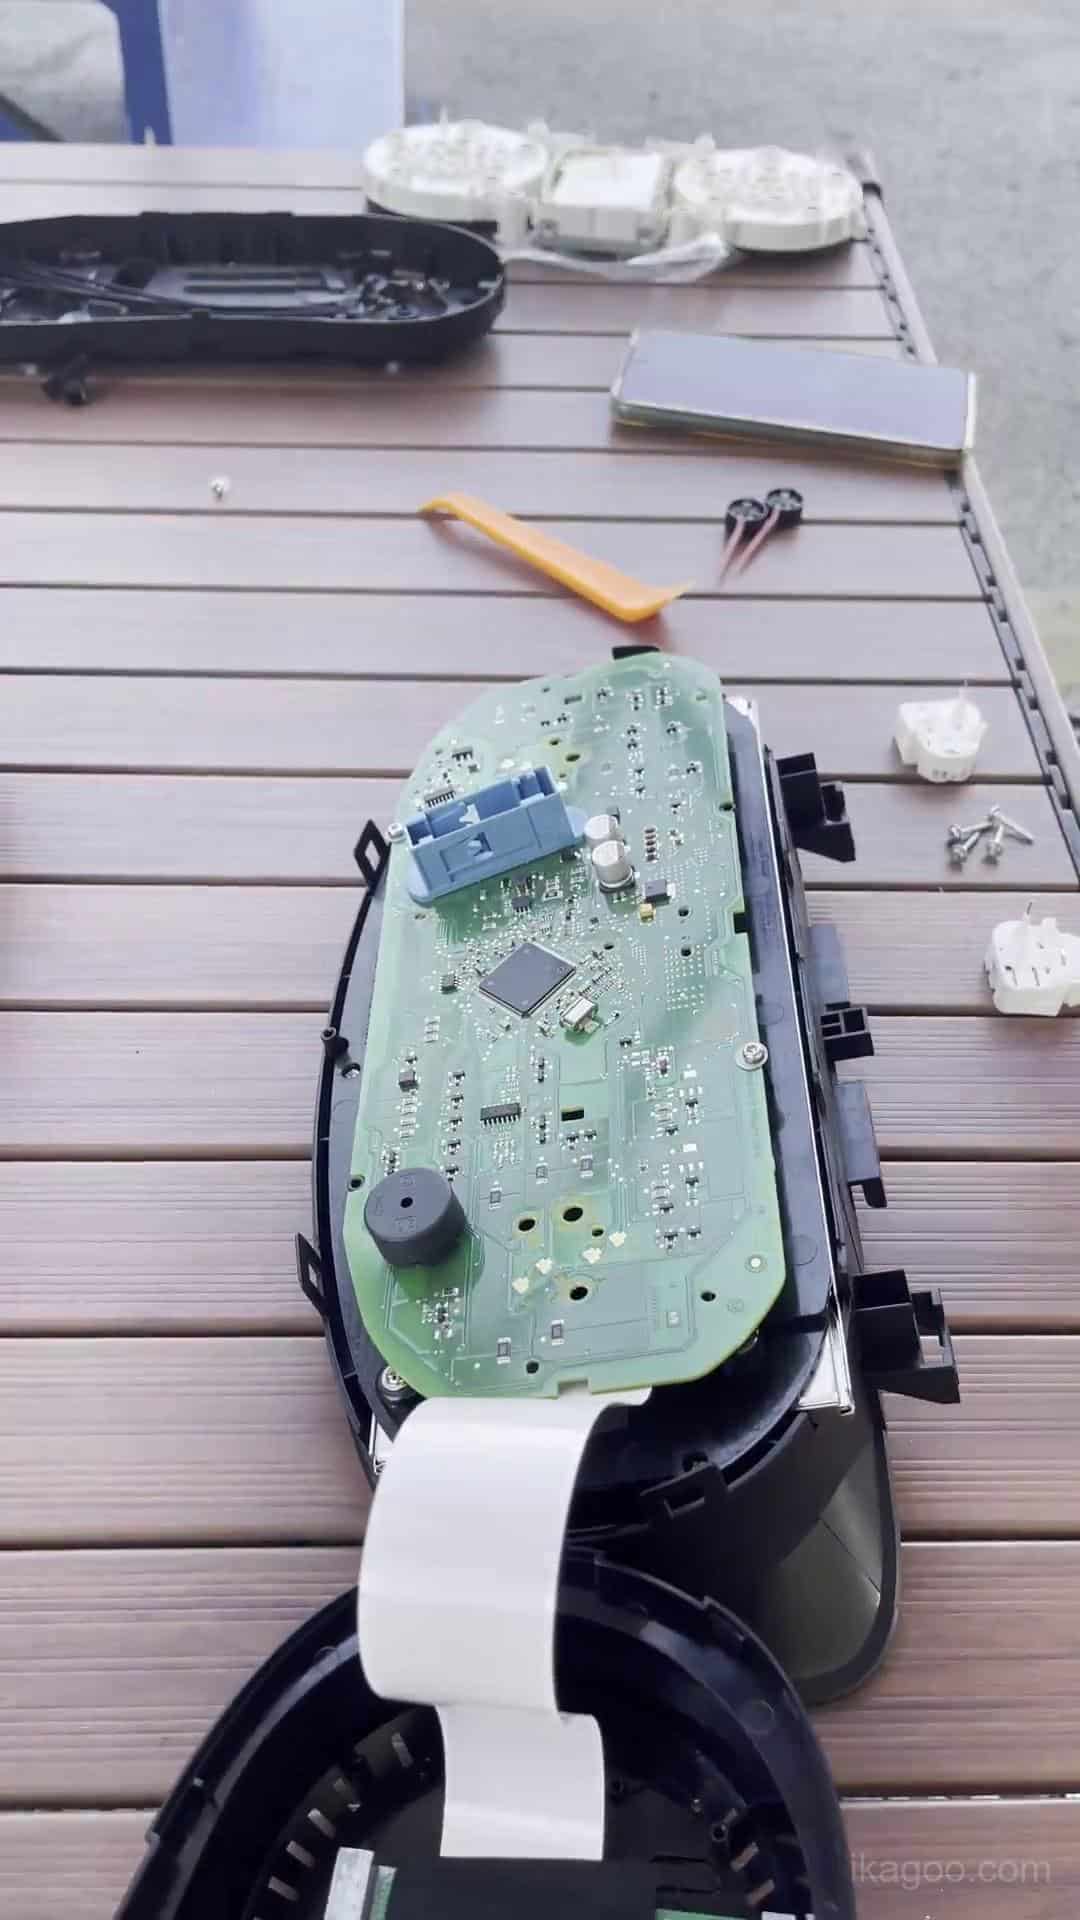
الخطوة 13. أعد توصيل المجموعة الرقمية
أعد توصيل حزمة أسلاك المركبة الأصلية بالكامل وضع المجموعة المطورة داخل فتحة العدادات. اترك الإطار المحيط مفتوحًا لاختبار التشغيل الأول.
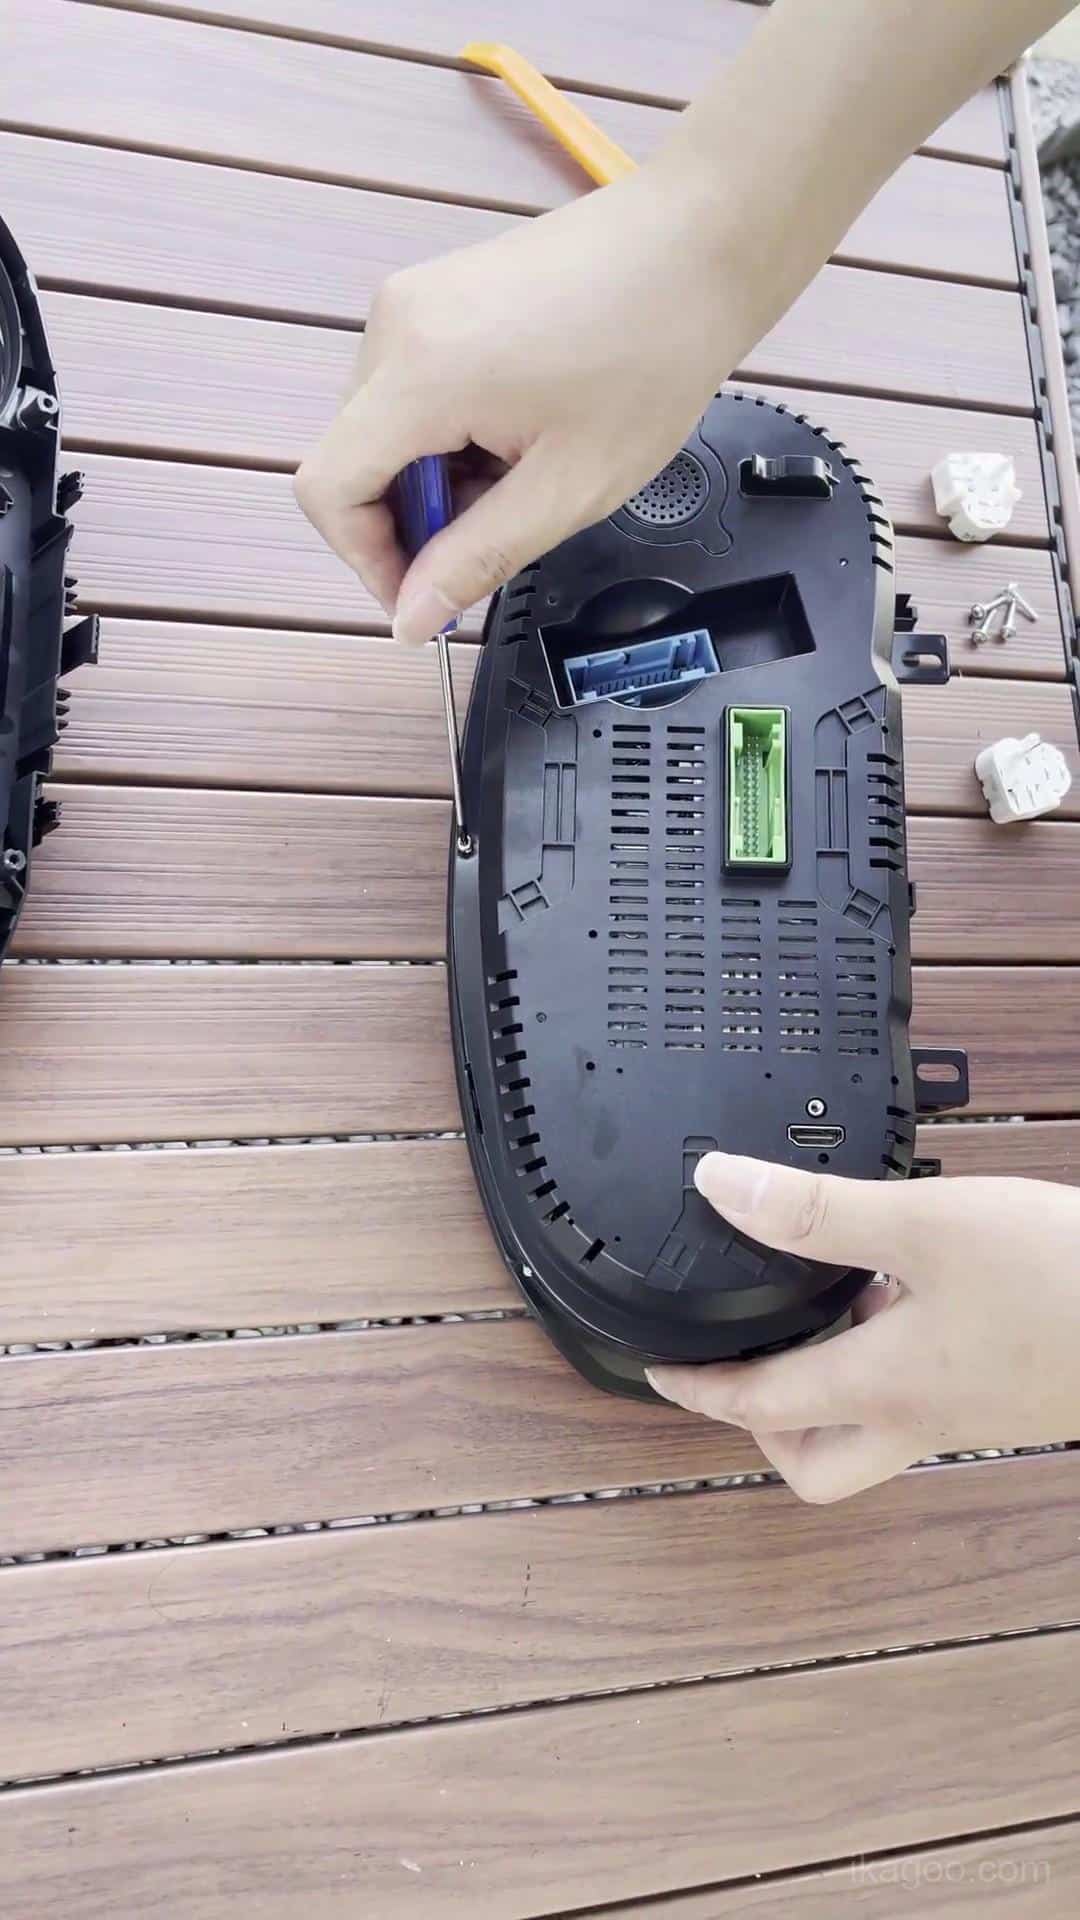
الخطوة 14. مدّ كابلي USB
أبقِ كلا طرفي USB في متناول اليد بالقرب من منطقة التخزين السفلية اليسرى أسفل عجلة القيادة.
يُحتفظ بأحد الكابلين من أجل الوصول إلى تحديث البرنامج عبر السلك. ويُستخدم الآخر من أجل العرض السلكي حيث تدعمه نسخة المجموعة الموردة.
التشغيل الأول والتركيب النهائي في لوحة القيادة
لا تعد تركيب جميع حواف لوحة القيادة حتى يجتاز العنصر اختبار أول تشغيل للطاقة.
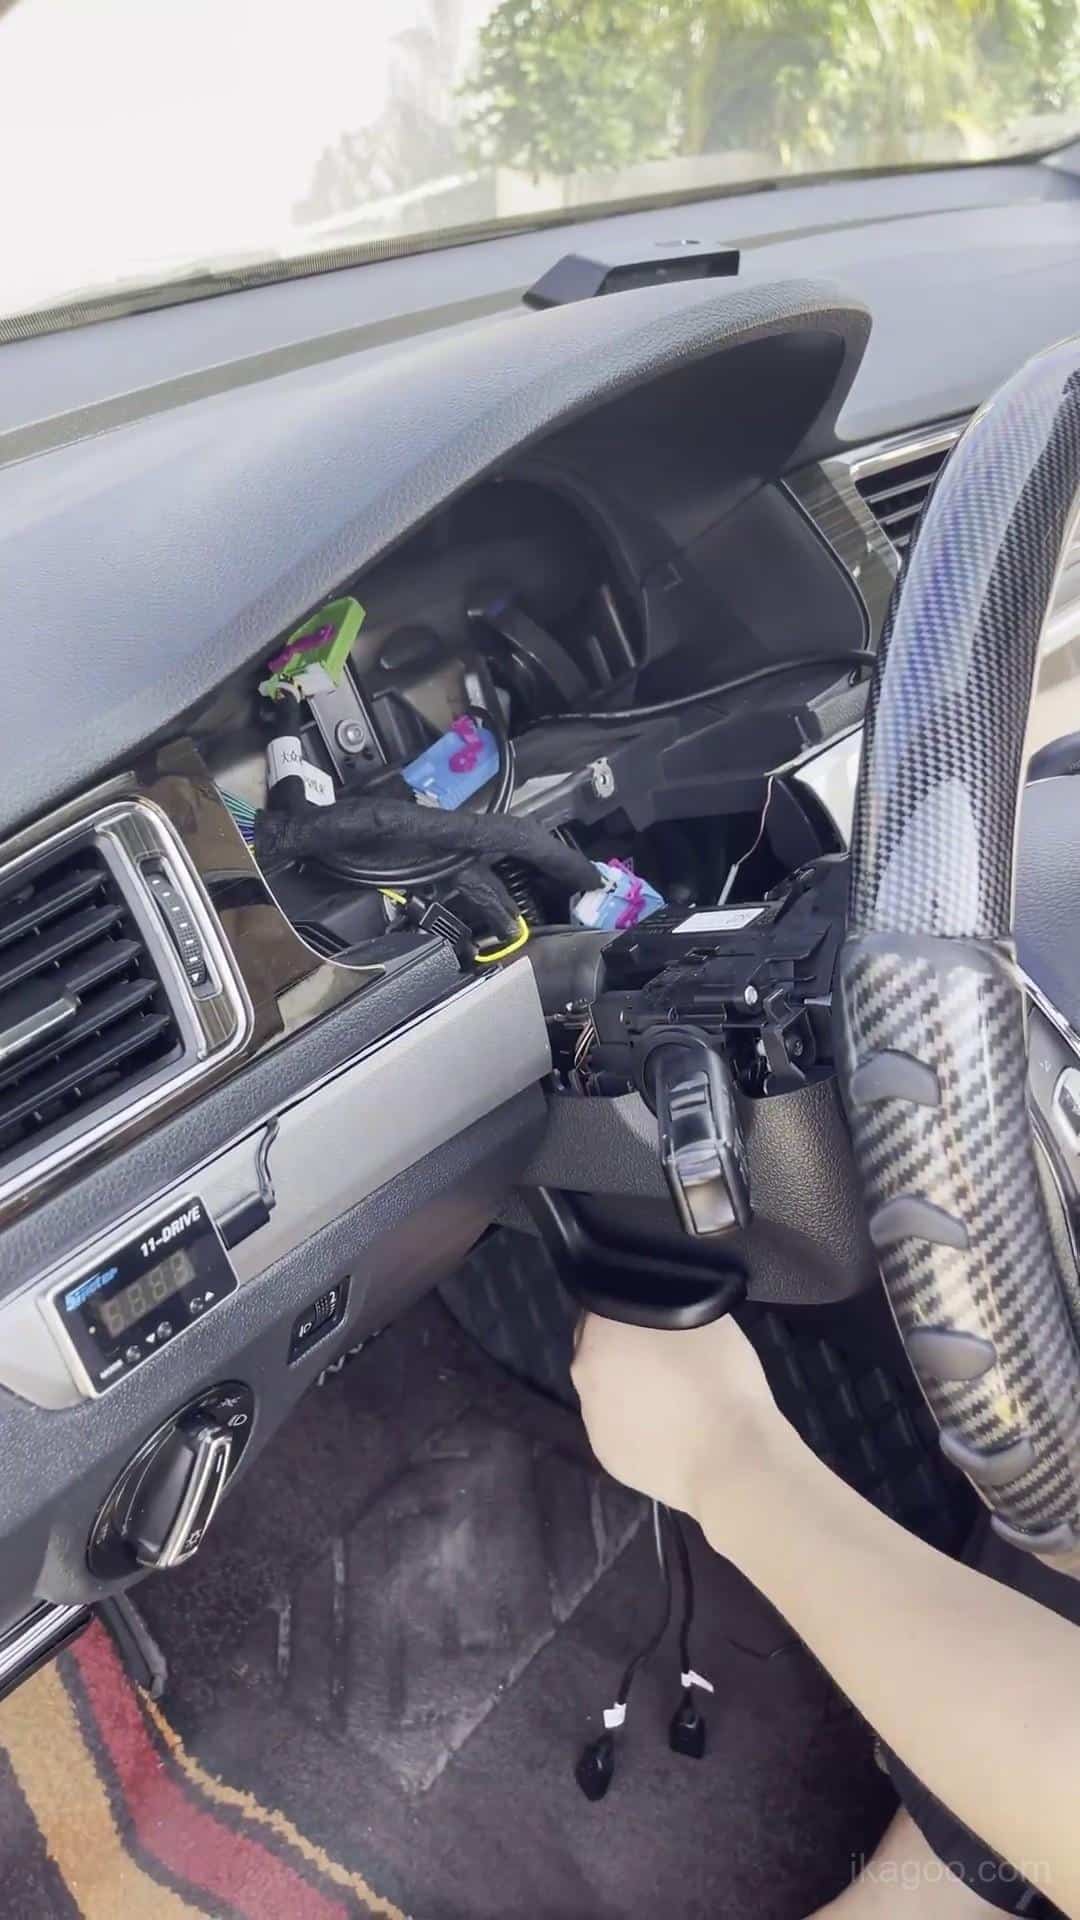
الخطوة 15. شغّل الطاقة واختبر العنصر الرقمي
راقب بدء التشغيل وسلوك التحذيرات وعرض بيانات المركبة الرئيسية. افحص شاشة LCD بحثًا عن خطوط غير طبيعية أو مناطق داكنة أو آثار ضغط.
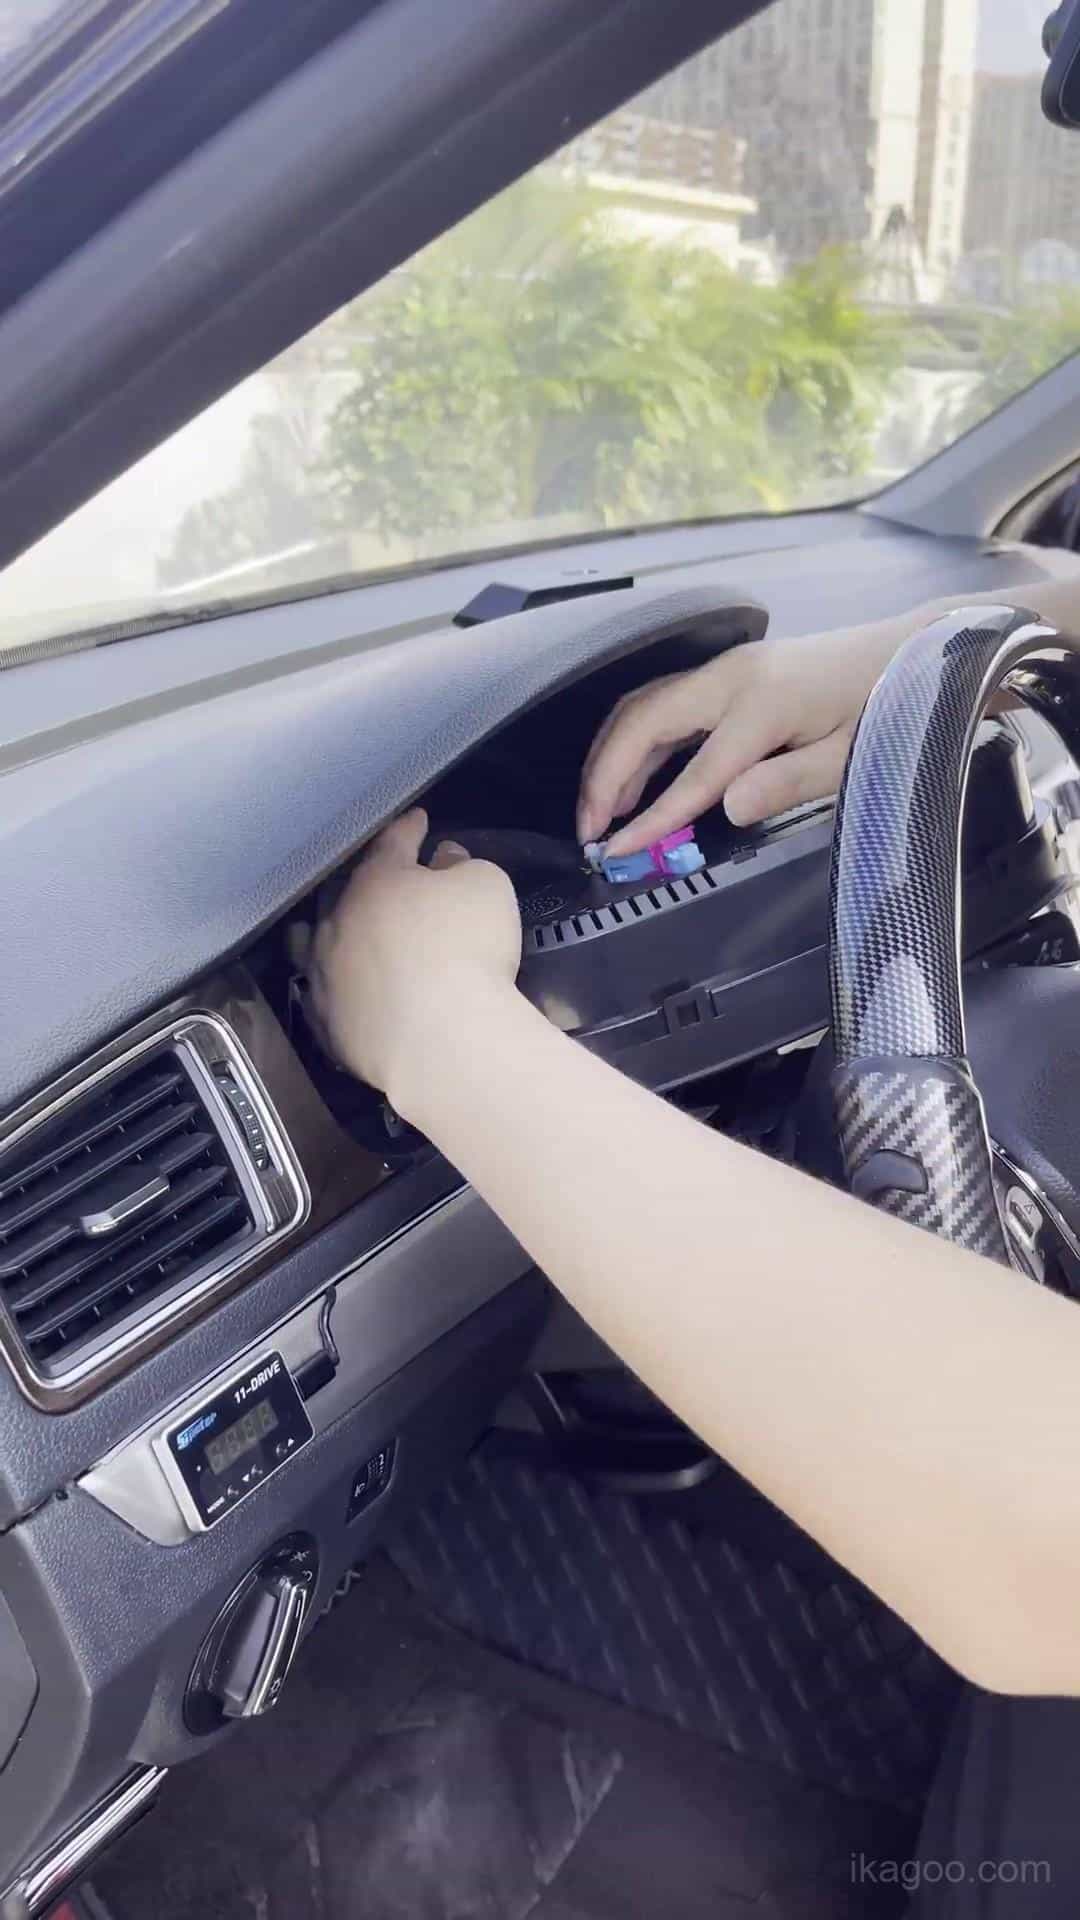
الخطوة 16. أعد تركيب حواف لوحة القيادة المحيطة
بعد اجتياز اختبار أول تشغيل للطاقة، قم بمحاذاة الحواف وإعادة تركيبها تدريجيًا. إذا تطلب الأمر ضغطًا غير معتاد، فافحص موضع العنصر ومسار الكابلات أولًا.
الخطوة 17. تحقق من التركيب النهائي
افحص لوحة القيادة المكتملة من موضع السائق. تأكد من التركيب النظيف وبدء التشغيل الطبيعي ومؤشرات التحذير وعرض الوقود وعرض إشارات الانعطاف وتشغيل القائمة وسلوك معلومات المركبة العام.
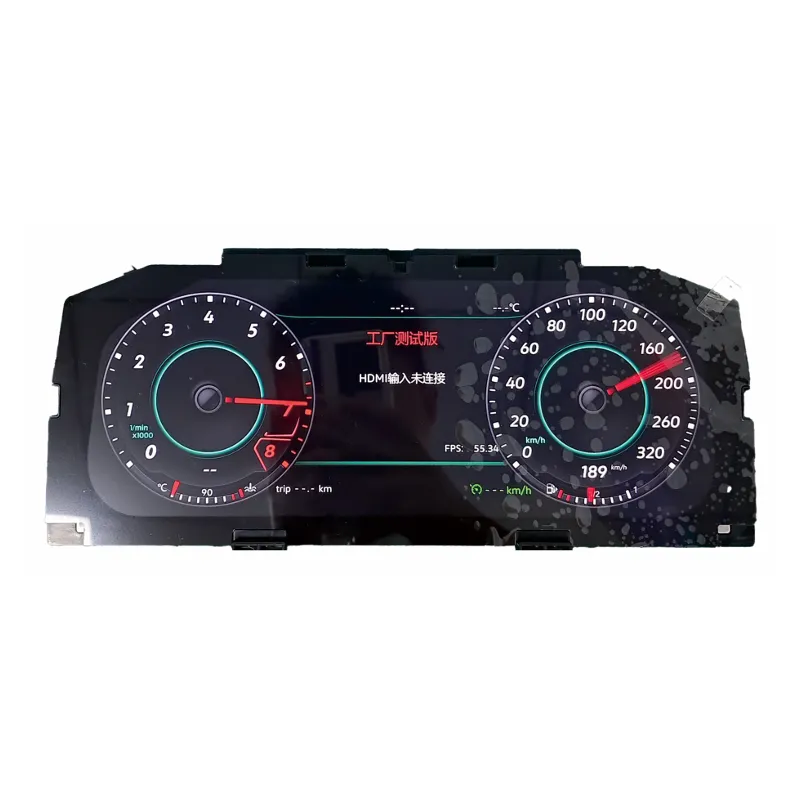
العنصر الرقمي لفولكس فاجن لافيدا 2013-2017
هذا هو مسار منتج العنصر الرقمي iKAGOO المرتبط بطريقة التركيب الموضحة أعلاه. وهو مخصص لتطبيقات فولكس فاجن المتوافقة التي تستخدم بنية مجموعة العدادات الأصلية المدعومة.
لا تطلب بناءً على السنة وحدها. قبل الشحن، يجب فحص لوحة القيادة الأصلية ومجموعة العدادات مقابل المسار المدعوم.
المعايرة والإعدادات بعد التركيب
معايرة سعة خزان الوقود
إذا لم يُظهر مقياس الوقود الامتلاء الكامل بعد التزود بالوقود: افحص المعايرة قبل افتراض وجود مشكلة في الأجهزة.
- املأ خزان الوقود بالكامل.
- قد السيارة لبضع مئات من الأمتار.
- افتح بيانات القيادة → كمية قابلة لإعادة التعبئة.
- اقرأ الكمية القابلة لإعادة التعبئة المعروضة.
- افتح الإعدادات → معايرة التكوين → سعة خزان الوقود.
- أدخل قيمة إعادة التعبئة المعروضة.
- بعد المعايرة الصحيحة، يجب أن تعود قيمة إعادة التعبئة إلى 0.
إعداد الضوء الفعلي
في مسار فولكس فاجن لافيدا PQ ذي الصلة، يجب أن يبقى الضوء الفعلي معطّلًا. قد تؤثر حالة التمكين غير الصحيحة على سلوك عرض إشارات الانعطاف.
Vehicle Model Selection
إذا لم تطابق صورة المركبة المعروضة داخل العنصر المركبة الحقيقية، فاستخدم إعداد اختيار طراز المركبة، واختر الطراز الصحيح، وأوقف تشغيل المركبة واقفلها لعدة دقائق قبل الفحص مرة أخرى.
استكشاف أخطاء العنصر الرقمي لفولكس فاجن لافيدا وإصلاحها
مقياس الوقود لا يُظهر الامتلاء الكامل
الفحص الأول: أكمل معايرة سعة خزان الوقود باستخدام قيمة الكمية القابلة لإعادة التعبئة.
عرض إشارة الانعطاف غير صحيح
الفحص الأول: تحقق من أن الإضاءة الفعلية معطلة على مسار PQ ذي الصلة.
يظهر تحذير خطأ في الأداة
الفحص الأول: تحقق من الاحتفاظ بالصفارة الأصلية واللوحة الإضافية عندما تضمنت المجموعة الأصلية واحدة.
يتم عرض رسم بياني خاطئ للمركبة
الفحص الأول: حدد طراز المركبة الصحيح، وأوقف تشغيل السيارة واقفلها لعدة دقائق.
لا يمكن الوصول إلى كابل USB لاحقًا
الفحص الأول: يجب أن يظل كلا كابلي USB في متناول اليد بالقرب من منطقة التخزين السفلية اليسرى.
المجموعة الرقمية لا تبدأ
الفحص الأول: افحص موصل المركبة الأصلي وتركيب اللوحة المحتفظ بها.
شاشة LCD بها خطوط أو علامات ضغط
الفحص الأول: افحص الهيكل وشاشة LCD. لا تضغط مباشرة على الشاشة أثناء إعادة التجميع.
المجموعة لا تستقر بشكل صحيح
الفحص الأول: افحص موضع الهيكل، ومسار USB، وإطار لوحة القيادة المحيط.
قائمة التحقق النهائية للتركيب
الأجهزة
- تم تركيب اللوحة الأصلية بشكل صحيح
- تم الاحتفاظ بالصفارة الأصلية
- تم نقل اللوحة الإضافية إذا كانت موجودة في الأصل
- لا توجد شرائط أو كابلات محصورة
- لا يتم تطبيق ضغط على شاشة LCD
تشغيل المركبة
- تبدأ مجموعة العدادات بشكل طبيعي
- تم فحص مؤشرات التحذير
- تم فحص عرض الوقود
- تم فحص إشارات الانعطاف
- تم فحص عناصر التحكم في القائمة
الإعدادات
- تم إكمال معايرة الوقود إذا لزم الأمر
- تم فحص إعداد الإضاءة الفعلية
- تم فحص رسم المركبة
الدعم المستقبلي
- كلا كابلي USB في متناول اليد
- تم تصوير شاشة البرنامج/الإصدار
- تم تصوير لوحة القيادة النهائية المركبة
موصى به: احفظ صورة واضحة لشاشة البرنامج/الإصدار بعد التثبيت. فهي تساعد في تحديد الإصدار المثبت بدقة إذا لزم تحديث مستقبلي أو دعم فني.
موارد iKAGOO ذات الصلة
منتج لوحة العدادات الرقمية من فولكس فاجن
راجع المنتج المرتبط بمسار التثبيت هذا.
عرض المجموعة الرقمية →دليل مستخدم المجموعة الرقمية VW & Audi
استخدم الدليل للتشغيل والإعدادات والإرشادات المدعومة بعد التثبيت.
افتح دليل المستخدم →هل تحتاج إلى لوحة العدادات الرقمية المستخدمة في تثبيت لافيدا هذا؟
أرسل طراز فولكس فاجن لافيدا 2013-2017 مع صور واضحة للوحة القيادة الأصلية ولوحة العدادات حتى يمكن التحقق من التكوين قبل الشحن.
الأسئلة الشائعة حول تثبيت لوحة العدادات الرقمية في فولكس فاجن لافيدا 2013-2017
هل تناسب لوحة العدادات الرقمية كل فولكس فاجن لافيدا 2013-2017؟
لا. يجب أن تتوافق لوحة العدادات الميكانيكية الأصلية وبنية لوحة القيادة مع مسار التثبيت المدعوم لمنصة PQ.
هل يتطلب تثبيت لوحة العدادات الرقمية في فولكس فاجن لافيدا 2013-2017 قطع الأسلاك؟
لا يلزم قطع الأسلاك أو وصلات الضفيرة في مسار التثبيت المدعوم. لا يزال مطلوبًا إزالة لوحة القيادة ونقل المكونات الإلكترونية الأصلية.
ما الذي يجب فعله قبل إزالة لوحة عدادات لافيدا الأصلية؟
أكمل تحضير قائمة التحذيرات بينما لا تزال لوحة العدادات الميكانيكية الأصلية مثبتة، بما في ذلك إعدادات تحذير الإطارات الشتوية وحد السرعة الموضحة أعلاه.
هل يجب نقل لوحة العدادات الأصلية؟
نعم. يجب نقل الإلكترونيات الأصلية المطلوب الاحتفاظ بها وتثبيتها بشكل صحيح داخل لوحة العدادات الرقمية المطورة.
هل تحتوي كل فولكس فاجن لافيدا على اللوحة الإضافية الصغيرة؟
لا. تحتوي عليها بعض لوحات العدادات الأصلية ذات الفئات الأعلى. انقل اللوحة فقط عندما تكون موجودة في لوحة العدادات الأصلية.
لماذا يجب أن يبقى صافرة العدادات الأصلية مثبتة؟
الصافرة المحتفظ بها جزء من مسار التثبيت المدعوم هذا. قد تؤدي إزالتها إلى سلوك خلل في أداة العدادات المركبة.
لماذا يوجد كابلان USB؟
أحدهما يوفر وصولاً سلكيًا لتحديث البرنامج. والآخر يوفر عرضًا سلكيًا حيث تكون هذه الوظيفة مدعومة في إصدار لوحة العدادات الرقمية المرفق.
لماذا لا يظهر مقياس الوقود ممتلئًا بعد التزود بالوقود؟
تحقق أولاً من معايرة سعة خزان الوقود. اقرأ قيمة الكمية القابلة لإعادة التعبئة واستخدمها في إعداد المعايرة الموضح أعلاه.
هل يجب تمكين الإضاءة الفعلية؟
لا، ليس على مسار PQ ذي الصلة الموثق في هذا الدليل. قد يؤثر تمكينها بشكل غير صحيح على سلوك عرض إشارة الانعطاف.
ما الذي يجب فحصه قبل إغلاق لوحة القيادة؟
تحقق من بدء التشغيل الطبيعي ومؤشرات التحذير وعرض بيانات المركبة وحالة الشاشة وتثبيت اللوحة المحتفظ بها وثبات الموصلات قبل إعادة تركيب التشطيب النهائي.
ما المنتج الموصى به لهذا التثبيت؟
استخدم iKAGOO ترقية لوحة العدادات الرقمية 12.3 بوصة لسيارة VW توجيه وتأكيد لوحة القيادة الأصلية ومجموعة العدادات قبل الشحن.








Add comment